
Borderlands 4: The Council Divided Walkthrough
Your complete guide to completing The Council Divided side mission in Borderlands 4
Table of Contents
How to Unlock The Council Divided Mission
The Council Divided is part of an extensive questline that begins with Enter the Electi Part 1. To unlock this mission, you must first complete both Enter the Electi Part 1 and Enter the Electi Part 2 missions.
Prerequisite Mission: Complete Enter the Electi Part 2
Finish the preceding story mission to unlock access to The Council Divided side quest.
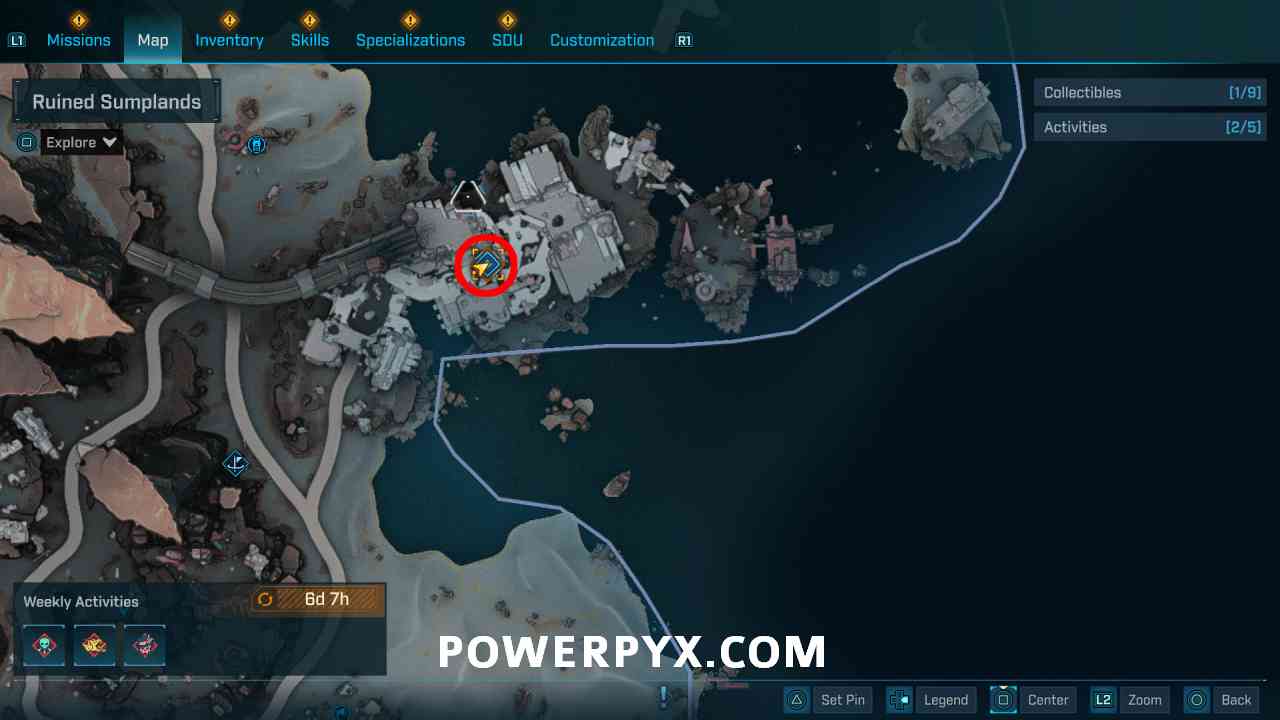
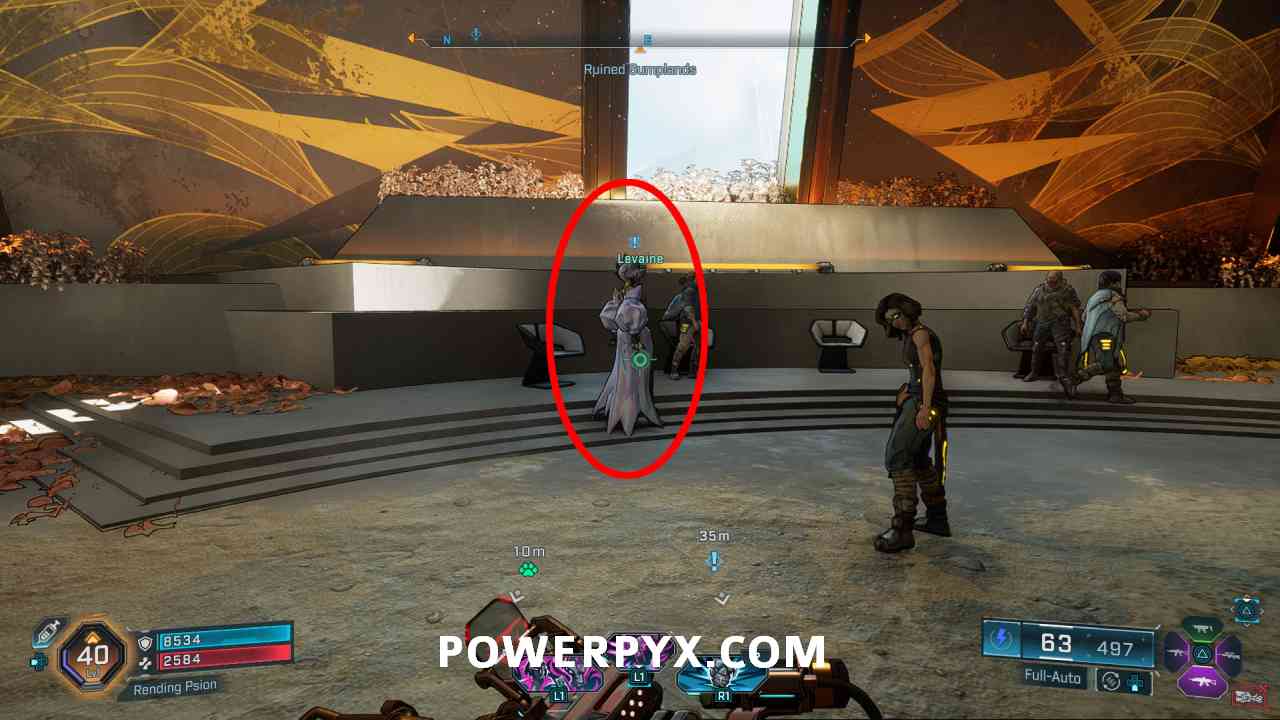
Borderlands 4 Levaine Location
After completing the prerequisites, you can start the side mission by talking to Levaine in the eastern part of Carcadia, southeast of Ruined Sumplands.
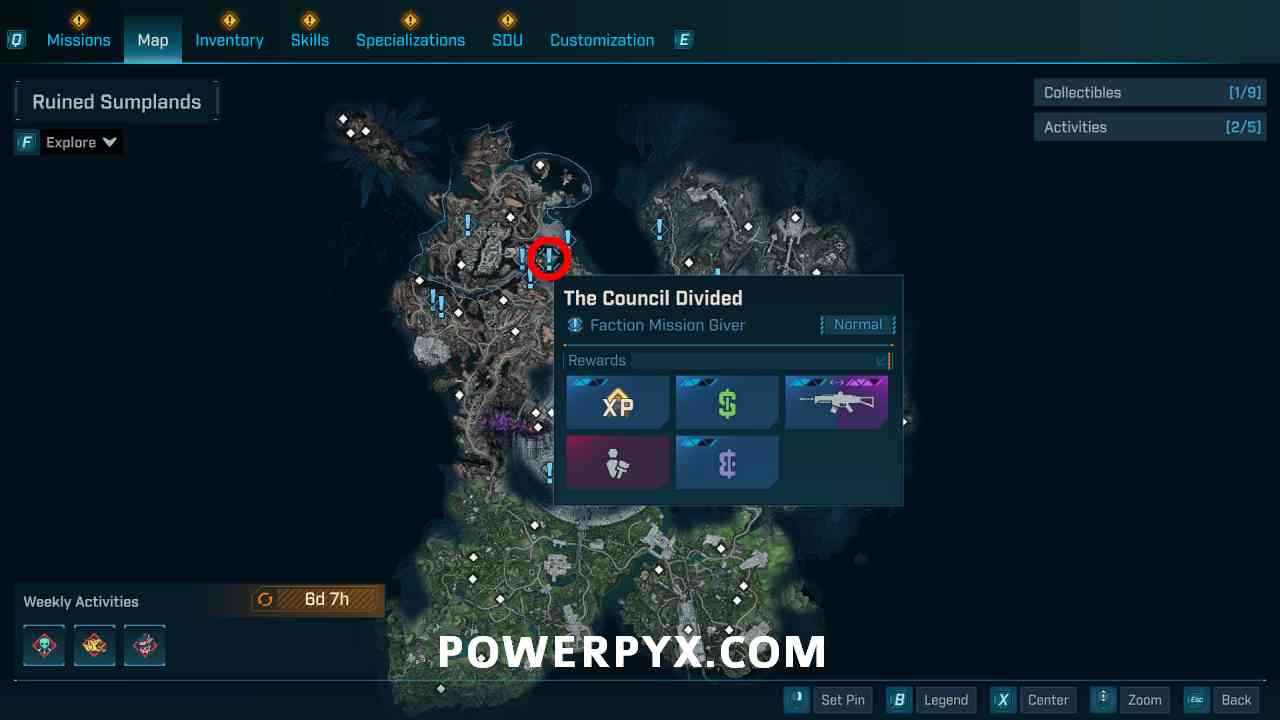
Levaine can be found near the abandoned warehouses in eastern Carcadia
Borderlands 4: The Council Divided Walkthrough Guide
This mission involves three primary objectives that will test your combat skills and exploration abilities. Follow this step-by-step guide to complete The Council Divided efficiently.
1. Find Weapon Crates
Walkthrough Steps:
Step 1:
Head northwest to Pain Street. The weapon crates are located on the upper level of the ruined building in the middle of the area.
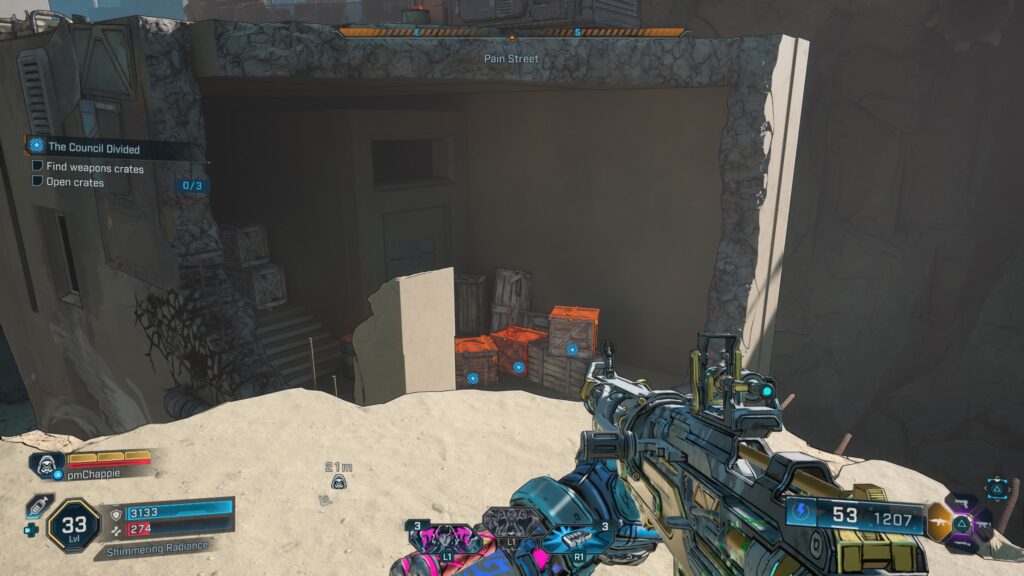
The crumbling building in central Pain Street holds the weapon crates
Step 2:
Perform a melee attack to open the marked crates and listen to the ECHO Log underneath one of them.

The ECHO Log contains crucial story information about the divided council
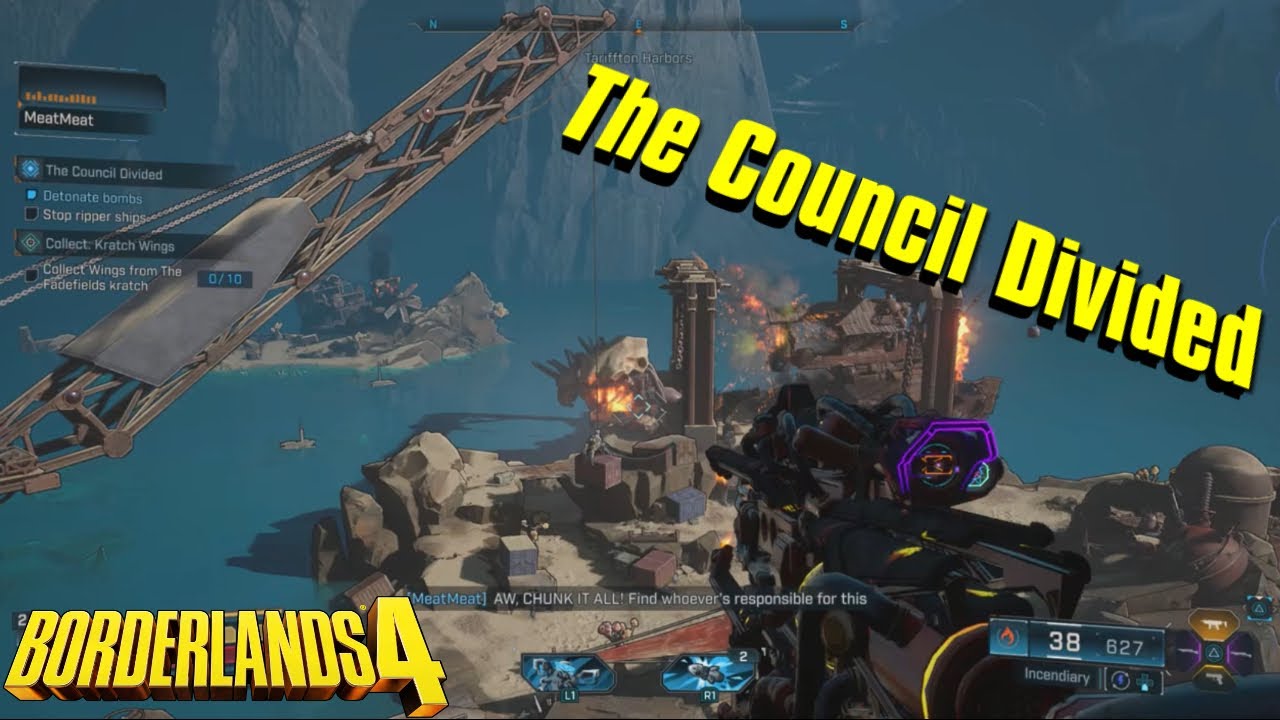
2. Stop Ripper Ships
Walkthrough Steps:
Step 1:
From Pain Street, head northeast to reach the sea base in Tariffton Harbors. Be prepared for enemy encounters in this area.
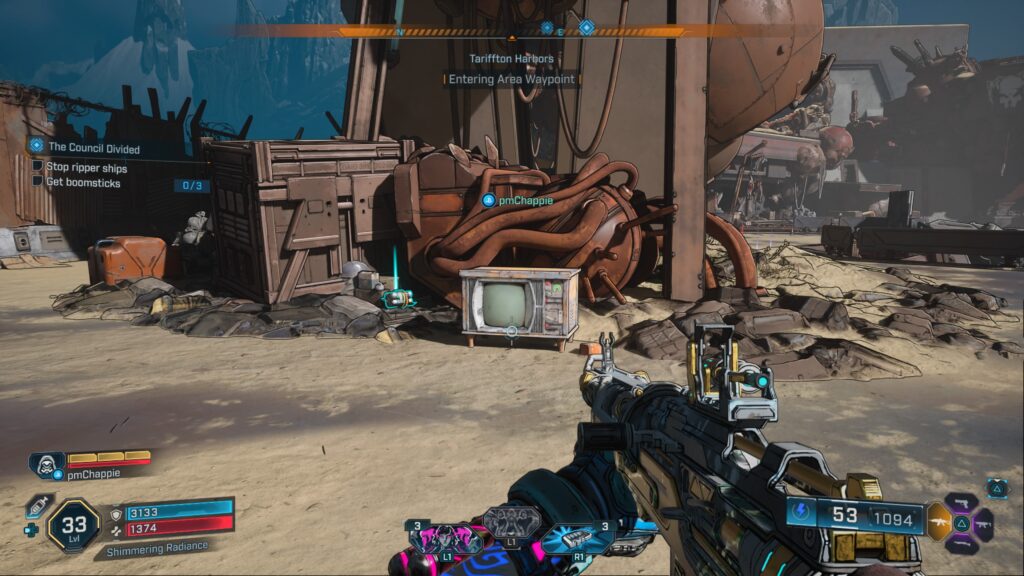
The sea base is heavily guarded - come prepared for combat
Step 2:
Follow the blue markers to locate the boomsticks needed for the mission.
The boomsticks are essential for disabling the Ripper Ships
Step 3:
Proceed further into the sea base. Climb up the large red pipe and glide over to the ladder to reach the rooftop where you'll find the detonator on a box.
The detonator is crucial for the ship sabotage operation
Step 4:
Follow the marked locations to the docks and attach two bombs to each ship. The marked spots are at the front and back of the ships.
Place bombs strategically on both ends of each ship
Step 5:
Head to the marked location to find an elevator. Pull the nearby lever to ascend to the upper level.

The elevator provides access to the detonation area
Step 6:
Turn right and place the detonator on the antenna. Grapple up the ledge just behind you and flip the switch to detonate the bombs.
The antenna provides the signal range needed to detonate all bombs simultaneously
Video Guide: Stopping the Ripper Ships
3. Kill Meat Meat's Crew
Walkthrough Steps:
Step 1:
After detonating the bombs, Meat Meat's crew will arrive at the sea base seeking retaliation. Eliminate all crew members, including Meat Meat himself.

Meat Meat's crew consists of heavily armed bandits - use cover effectively
Step 2:
Pick up the ECHO Log dropped by Meat Meat to complete the mission.

The ECHO Log reveals important story elements about the divided council
Meat Meat Boss Fight Strategies
Meat Meat is a formidable opponent with unique attack patterns. Here are some effective strategies:
- Target his fuel canisters for explosive damage
- Use corrosive weapons to break through his armor
- Stay mobile to avoid his charge attacks
- Focus on his crew first to reduce incoming damage
- Utilize the environment for cover during his explosive attacks
The Council Divided Mission Rewards
Completing The Council Divided offers valuable rewards that will aid you in your journey through Borderlands 4.
Base Mission Rewards
- • Substantial Experience Points (Scales with your level)
- • Generous Cash Reward
- • Eridium Currency
Weapon Reward
• Assault Rifle (Blue to Purple Rarity)

This weapon often comes with elemental effects and strong stats
Cosmetic Reward
• Vault Hunter Style (Middle Name "Danger")

The Middle Name "Danger" Skin can be applied in the Customization menu
Related Borderlands 4 Guides
Previous Mission: Enter the Electi Part 2
Complete the prerequisite mission to unlock The Council Divided.
Read Guide →Next Mission: A Traitor Within
Continue the story after completing The Council Divided.
Read Guide →Borderlands 4 Character Builds
Optimize your Vault Hunter for missions like The Council Divided.
Read Guide →Enjoying This Borderlands 4 Guide?
Check back for more updates and detailed walkthroughs for all Borderlands 4 missions!