
Borderlands 4 Savage Salvage Walkthrough
Complete guide to finishing the Savage Salvage side mission in Borderlands 4 with detailed objectives and strategies.
This comprehensive walkthrough will guide you through the Savage Salvage side mission in Borderlands 4. Follow our step-by-step instructions to complete all objectives and claim your rewards.
Pro Tip:
Make sure you have a good shock weapon before attempting this mission, as it's effective against many of the enemies you'll encounter.
Table of Contents
How to Unlock Savage Salvage Mission
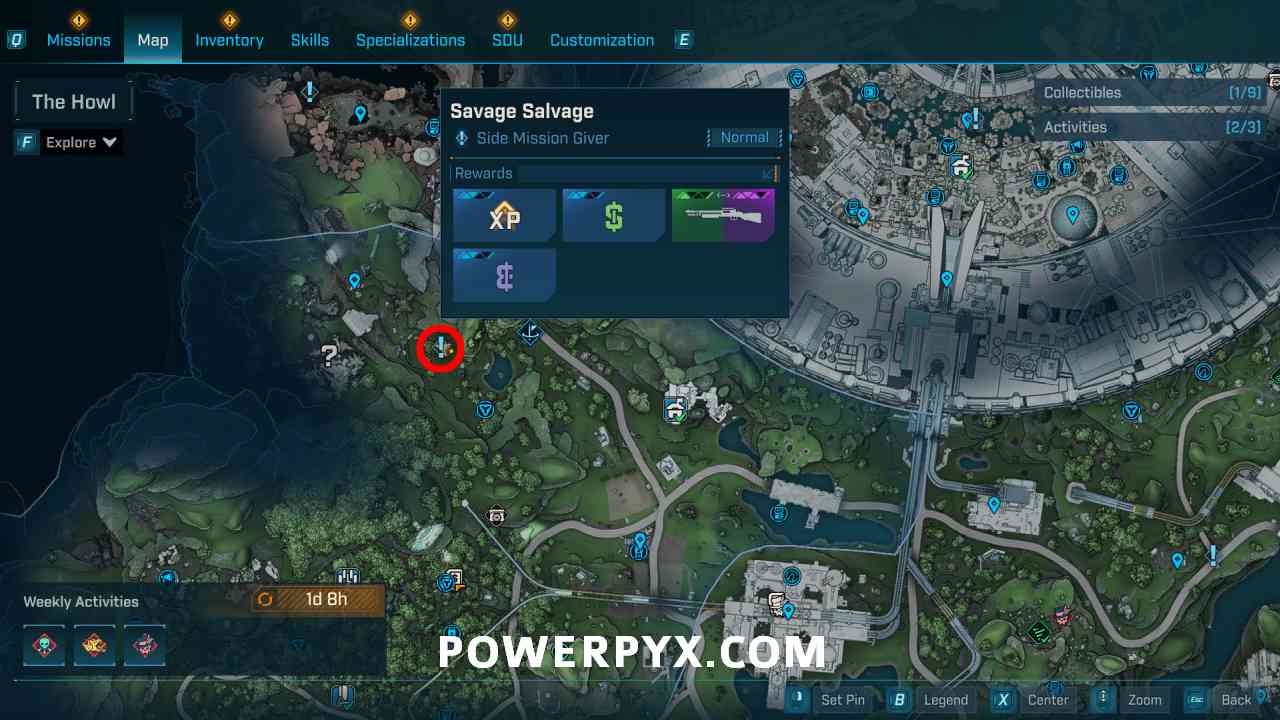
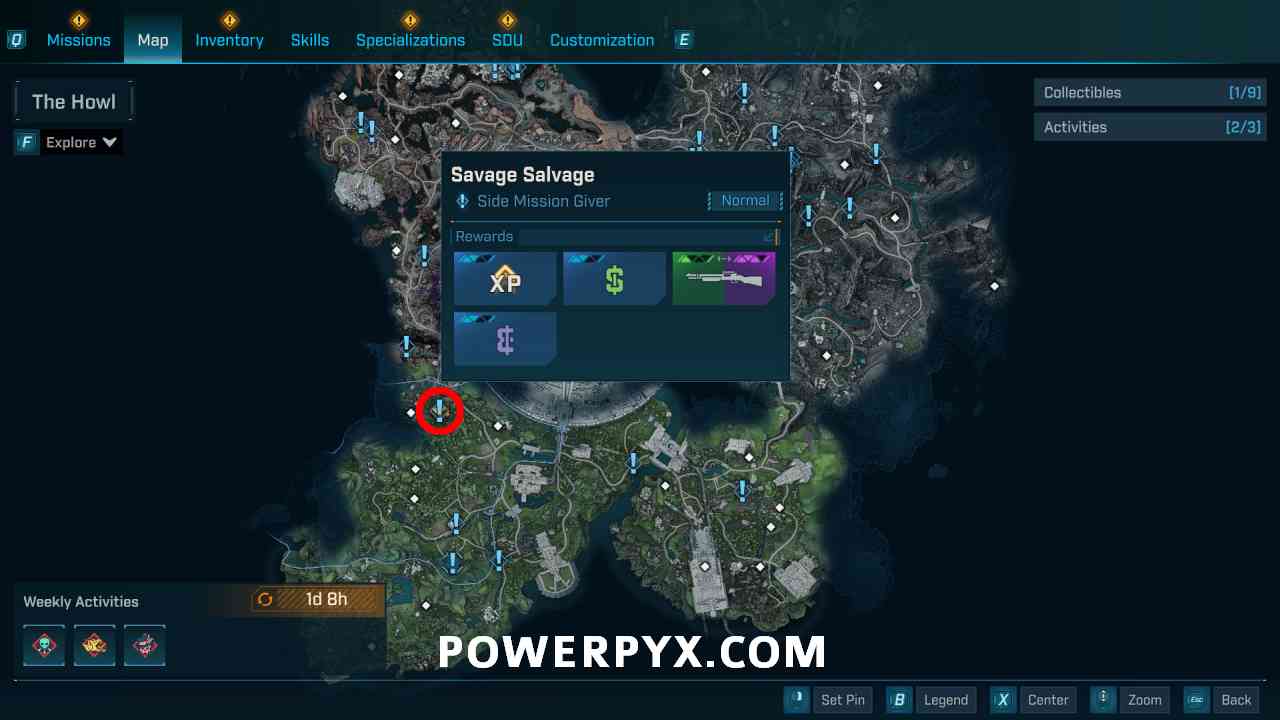
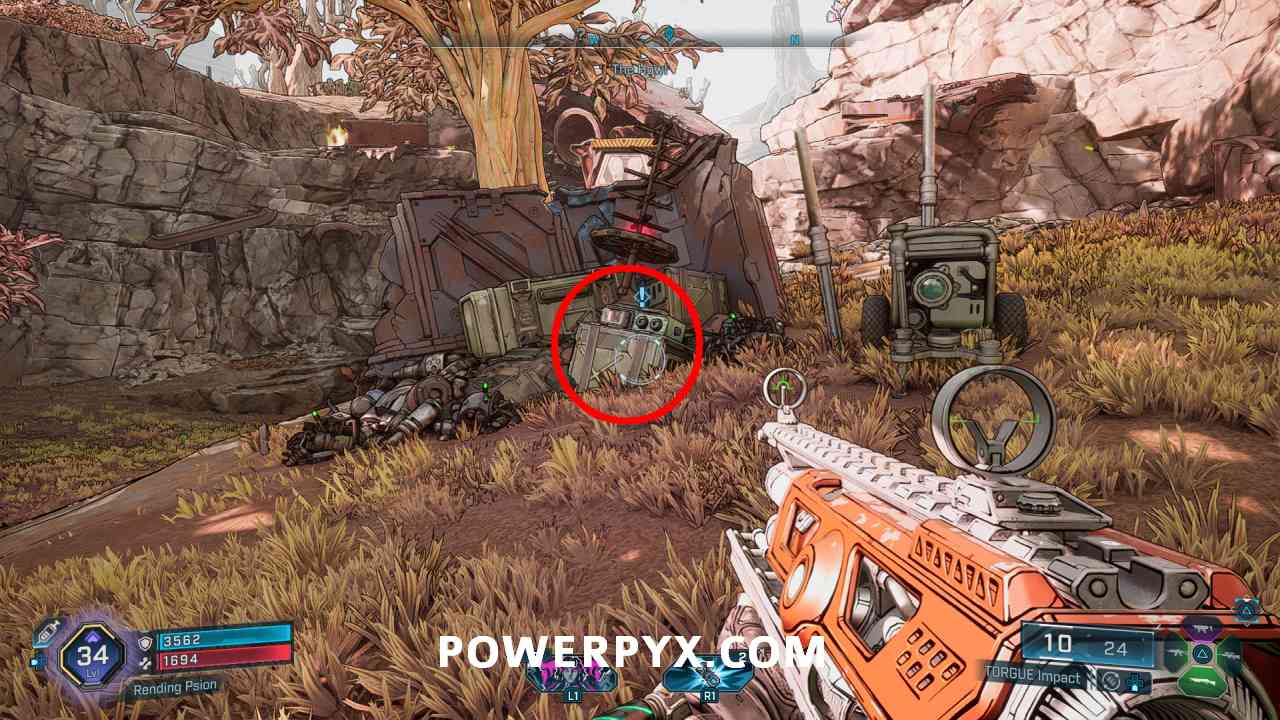
To begin the Savage Salvage side quest, you'll need to find and interact with a specific radio in The Howl region.
Interact with the Radio in The Howl
The radio is located in the northern part of The Howl, southeast of The Wreck of the Maestar. Look for it in a pile of junk surrounded by wreckage.
The radio is partially hidden in junk, so look carefully for the interaction prompt.
Prerequisites for Savage Salvage
- Complete the main story mission "Wreck of the Maestar"
- Reach at least level 15
- Have the grappling hook equipment unlocked
Complete Savage Salvage Mission Walkthrough
Follow these steps carefully to complete the Savage Salvage mission efficiently.
Find Crash Survivor
Head to The Wreck of the Maestar
Once you've accepted the mission, head northwest to The Wreck of the Maestar. Use the nearby wreckage and your grappling hook to climb up the cliffs.
Be prepared for enemy encounters along the way - bring your best weapons!
Hack the Red Antenna
Climb onto higher ground to the northeast and hack the red-glowing antenna to get a stronger signal.
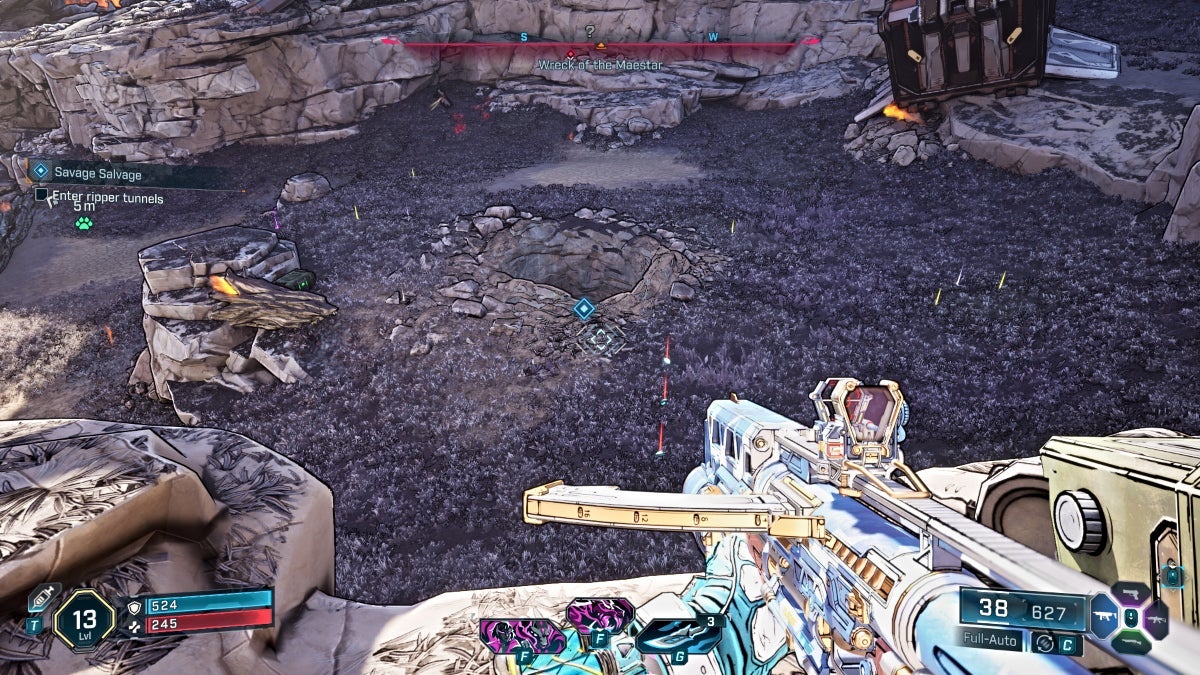
Enter the Ripper Tunnels
Jump back down to the wreckage and enter the ripper tunnels through the hole in the center.
Navigate to Ripper Camp
Once you're in the ripper tunnels, proceed forward and turn right when you reach a large cavern, leading you to a ripper camp.
Remove Vent Grille
There's a vent below the pipes. Use your grappling hook to remove the grille and enter through.
Eliminate Ripper Guards
Continue through the tunnels until you reach an area with a large metal sphere. Kill the ripper guards in the area.
Combat Tip:
Ripper guards are vulnerable to corrosive damage. Use corrosive weapons for quicker eliminations.
Rescue Derek
After killing the ripper guards, use your grappling hook to pull the door at the bottom of the metal sphere and free Derek, the crash survivor.

Follow Derek to Ripper Drill
Escort Derek Southeast
Follow Derek to the ripper drill going southeast. Kill rippers along the way to move forward.
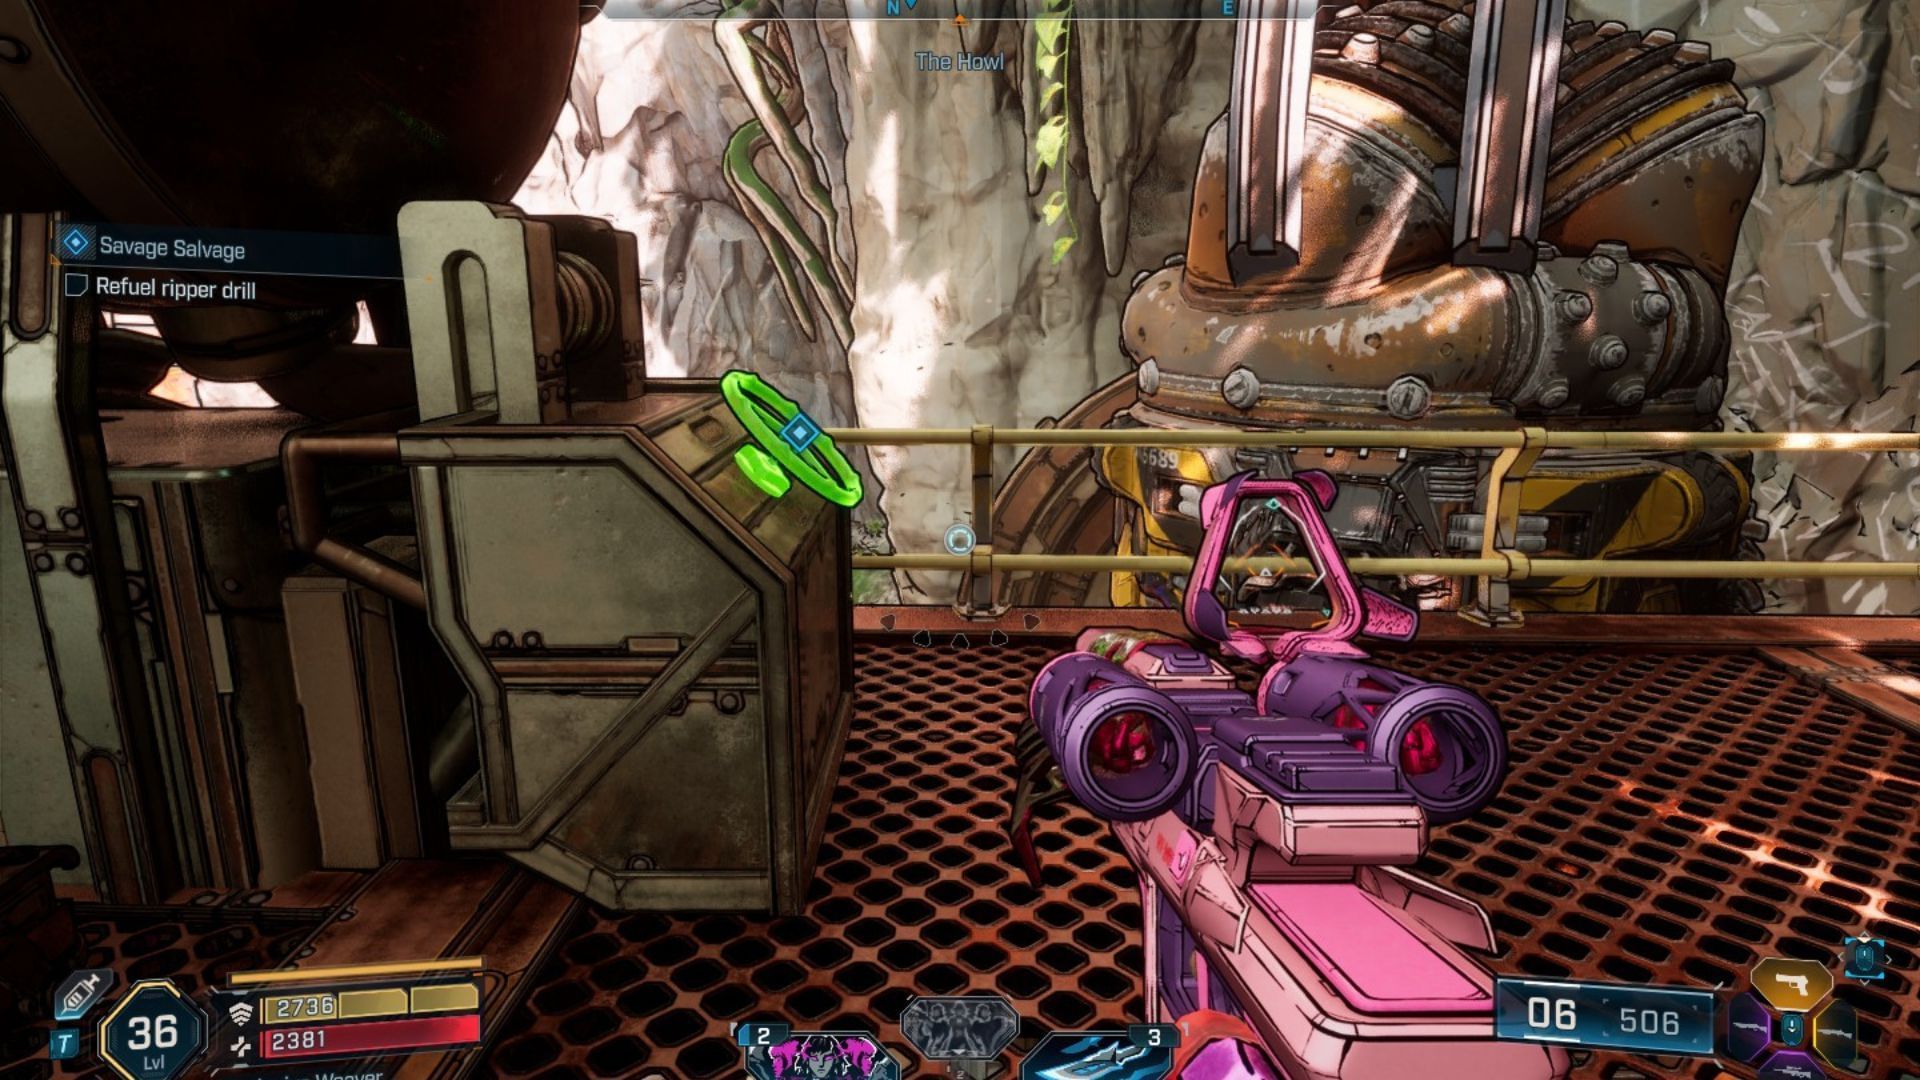
Refuel the Ripper Drill
Keep following Derek, and this will lead you to Hollow Nob. Derek will enter the ripper drill, but it will be out of gas. Head to the upper level and turn the valve to refuel the drill.
Defend Against Ambush
While the drill is refueling, you'll be ambushed by rippers. Defend the drill and kill the enemies in the area.
Defense Strategy:
Take high ground for better sightlines. Area-of-effect weapons work well against the grouped enemies.
Release the Drill
Once clear, interact with the switch near the ripper drill to release it. This will drill a hole that leads outside near where you accepted the quest.
Pull Derek Up and Defend
Follow Derek through the newly drilled tunnel, then pull him up from the ledge. You'll then be ambushed by rippers again. Kill them to proceed.
Defeat the Ravenous Thresher
Wait for Derek to jump down, and a Ravenous Thresher will then appear. Defeat it to complete the mission.
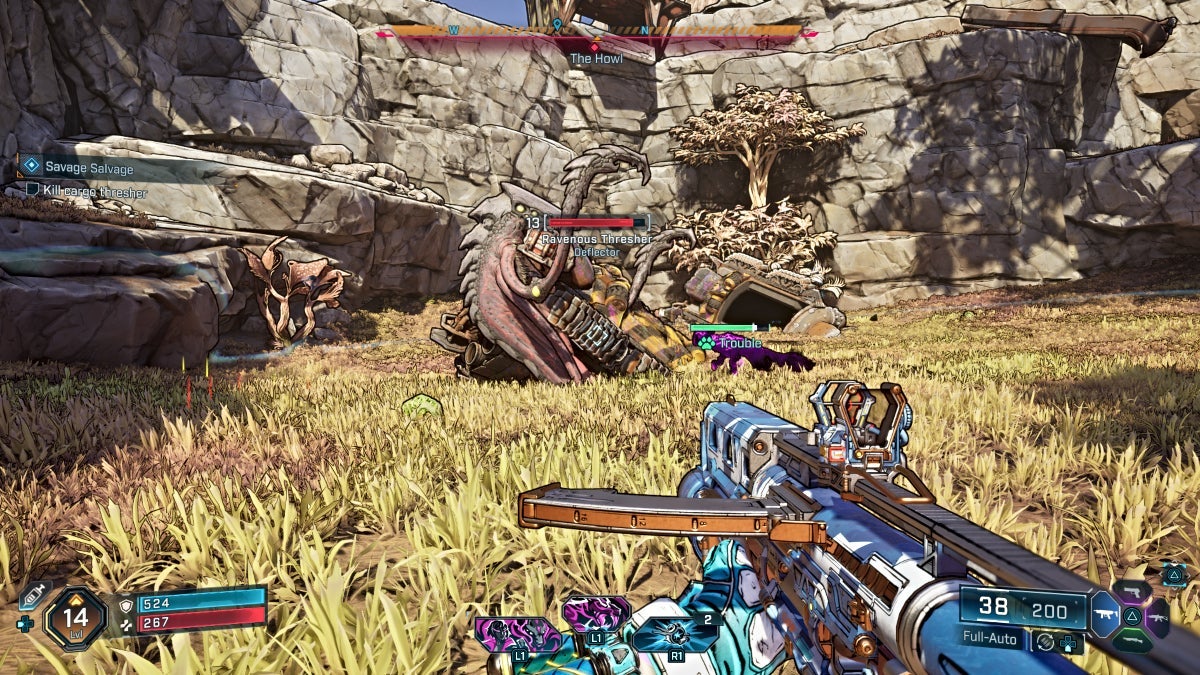
Boss Strategy:
The Ravenous Thresher is weak at its mouth and tentacle joints. Use fire weapons to maximize damage. Keep moving to avoid its burrow attacks.
Savage Salvage Mission Rewards
Base Rewards
- Experience Points (Scales with your level)
- Cash: ~$15,000
- Eridium: 25-35
- Increased reputation with Crimson Raiders
Equipment Rewards
- Random Shotgun (Green to Purple Rarity)
- Chance for unique class mod
- Possible grenade mod drop
- Artifact with salvage bonus stats
Potential Legendary Drops
The Ravenous Thresher has a chance to drop these legendary items:
- Thresher's Gulp (Legendary Shotgun)
- Earthshaker (Legendary Artifact)
- Ripper's Bane (Legendary Class Mod)
Related Borderlands 4 Guides
Best Early Game Weapons
Discover the most powerful weapons to look for in the early stages of Borderlands 4.
Read Guide →How to Farm Eridium Efficiently
Learn the best methods to farm Eridium for purchasing rare items.
Read Guide →All Vault Hunter Class Guides
Comprehensive guides for each Vault Hunter class and their skill trees.
Read Guide →Borderlands 4 Side Missions Tier List
Find out which side missions offer the best rewards for your time.
Read Guide →Final Thoughts on Savage Salvage
The Savage Salvage mission offers a great mix of exploration, combat, and puzzle-solving that makes it one of the more enjoyable side missions in Borderlands 4. The rewards are well worth the effort, especially if you're lucky enough to get a legendary drop from the Ravenous Thresher.
Did you find this walkthrough helpful? Let us know in the comments below if you have any other strategies for completing Savage Salvage!