
Borderlands 4 Returned to the Mountain Side Mission Walkthrough
Mission Overview
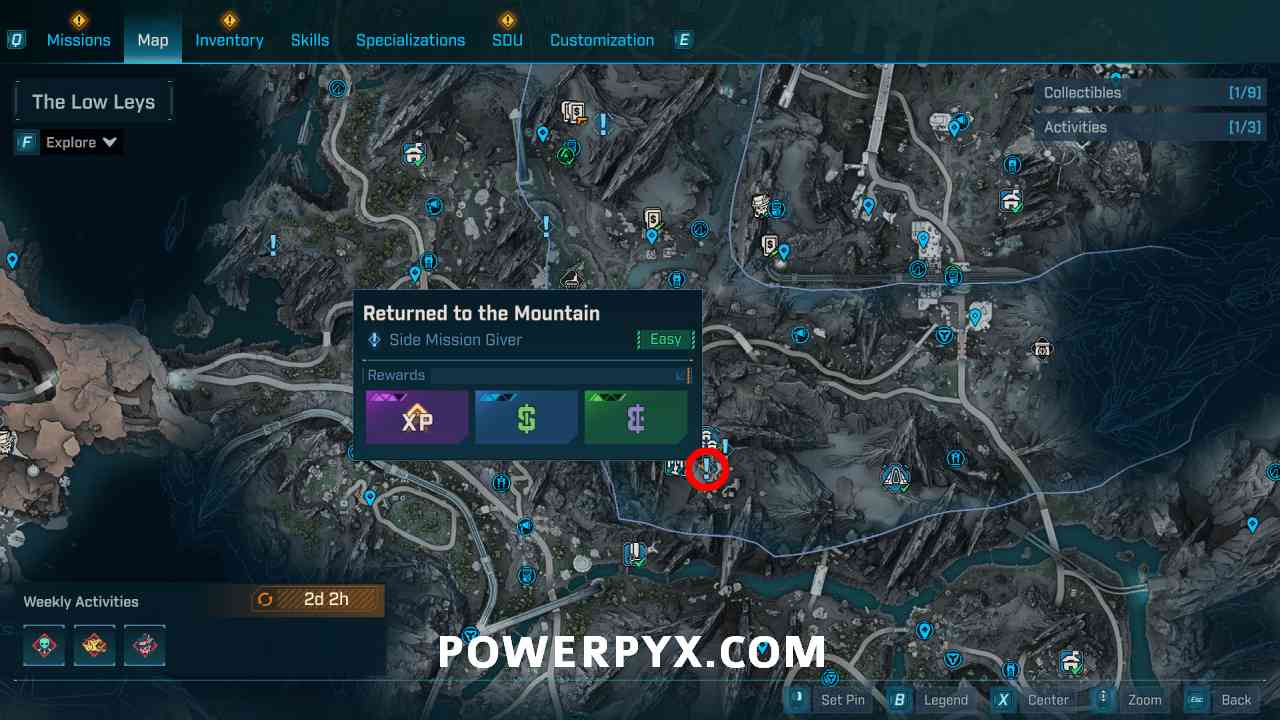
Returned to the Mountain is a side mission in Borderlands 4 (BL4). This walkthrough will guide you through all objectives of the Returned to the Mountain Side Quest.
Mission Details
- Starting Location: Terminus Range > The Low Leys
- Quest Giver: Defiant Calder
- Unlock Requirement: Unlocks after Main Mission 14: His Vile Sanctum
- Reward: XP, Money, Eridium
Quick Facts
- Mission Type: Side Quest
- Difficulty: Moderate
- Estimated Time: 20-30 minutes
- Enemy Types: Augers, Drones, Kratch
Quest Description
Honor the lives of Defiant Calder's fallen brethren by retrieving their bolts and returning them to the mountain.
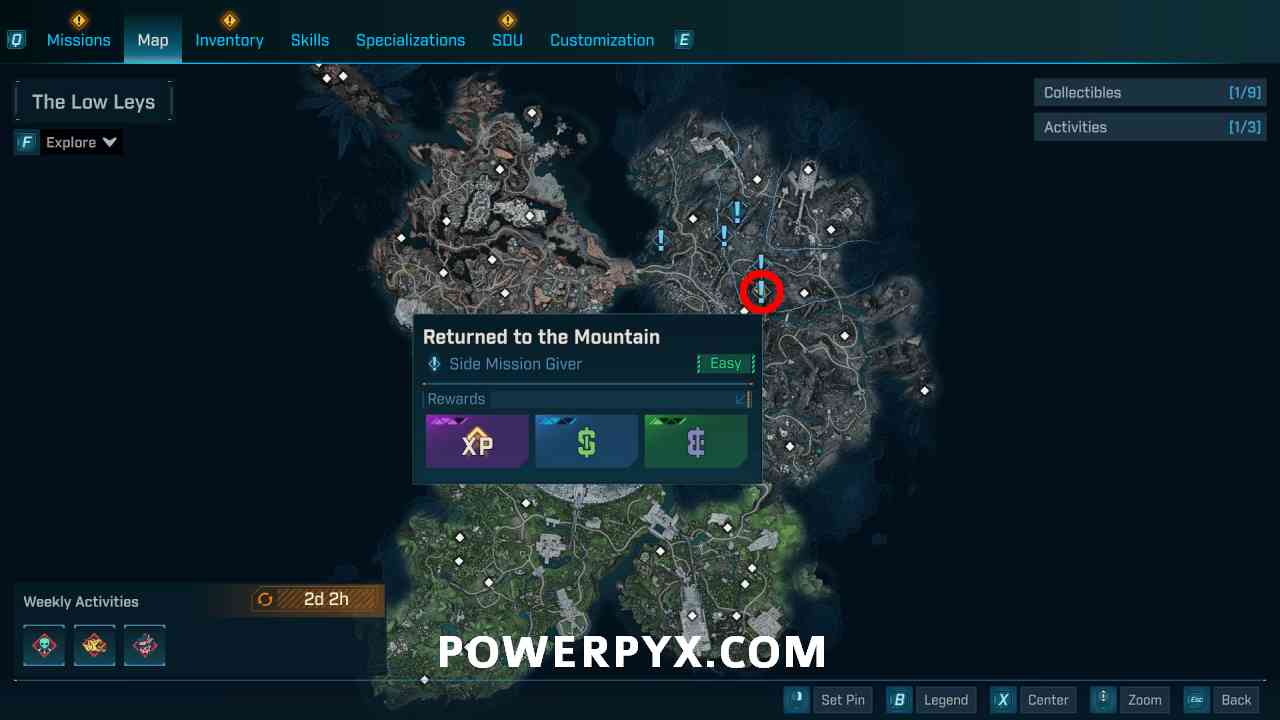
Starting Location: Returned to the Mountain
This quest can be done any time after Main Mission: His Vile Sanctum. Speak to Defiant Calder who walks up and down the steps in the middle of Belton's Bore.
Defiant Calder walking near the steps in Belton's Bore
Pro Tip:
Before starting this mission, make sure you have a good shock weapon equipped. Many of the enemies you'll encounter have shields that are vulnerable to shock damage.
Reach Clavehome
Calder sends you to Clavehome, located near the southeast edge of Terminus Range. The path is relatively straightforward but watch out for ambushes along the way.
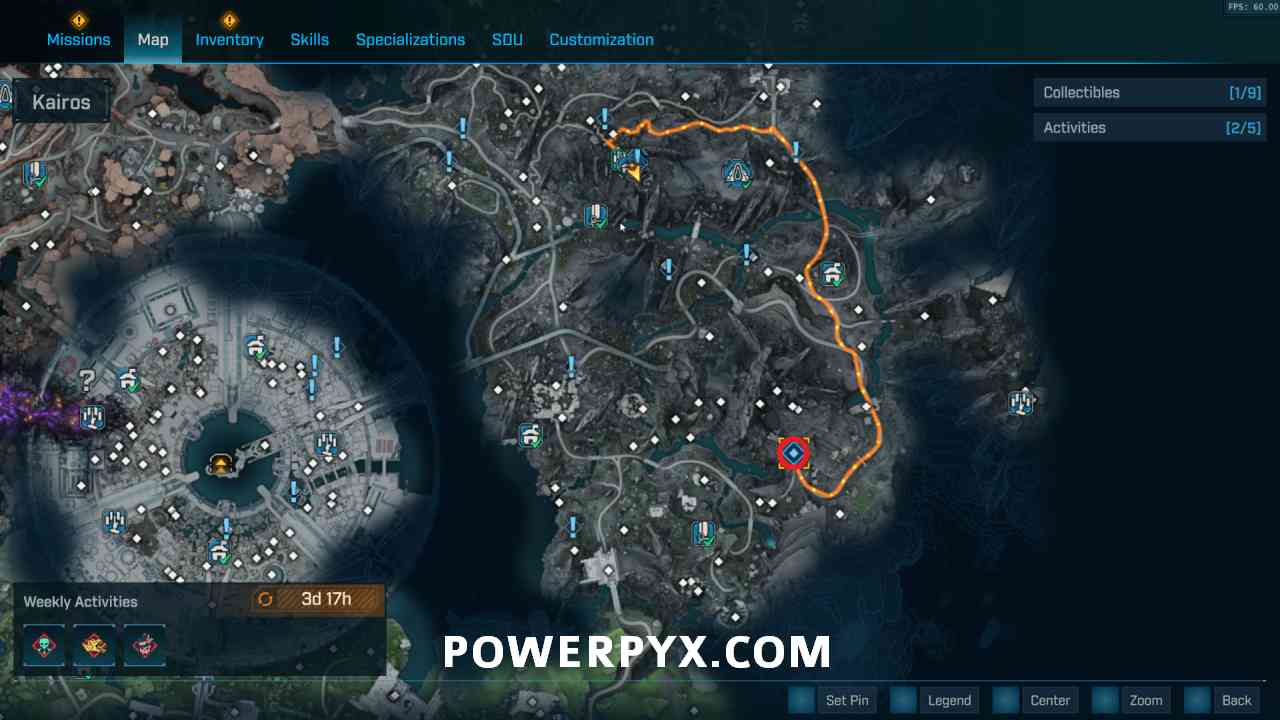
The route from Belton's Bore to Clavehome in Terminus Range
Video guide showing the path to Clavehome
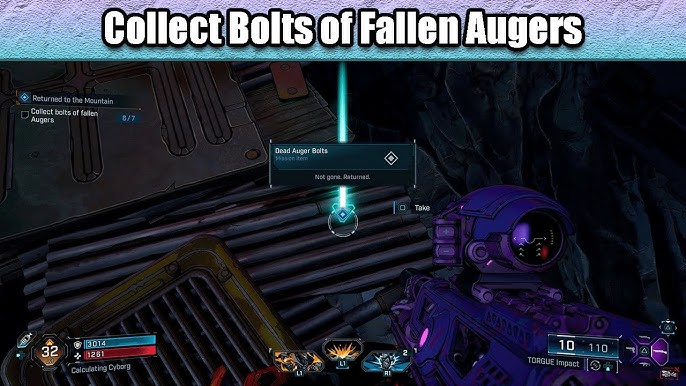
Collect Bolts of Fallen Augers (x7)
There are 7 bolts throughout the cave that you need to find and pick up. The cave is filled with enemies, so be prepared for combat while searching.
Bolt #1 Location
Defeat the first group of enemies, then jump up the ledge on the right to pick up the first bolt.
Bolt #2 Location

Continue into the next large room with more enemies. On the east side is a small side path where you can pick up the bolt off a table.
Bolt #3 Location
On the other side of this area grapple up to the higher platform, then follow the walkway to the end to pick up the bolt in the building by some bodies.
Bolt #4 Location

Drop back down and keep going north through the cave. The next bolt is on the right side of the open area.
Bolt #5 Location

Continue forward and grapple to the upper platform in the room with the drone enemies. Go through the door on the right, then immediately left to find the bolt by some bodies.
Bolt #6 Location

Continue into the next open area with the Kratch flying around. On the right you can find the next bolt on a platform that you need to jump to.
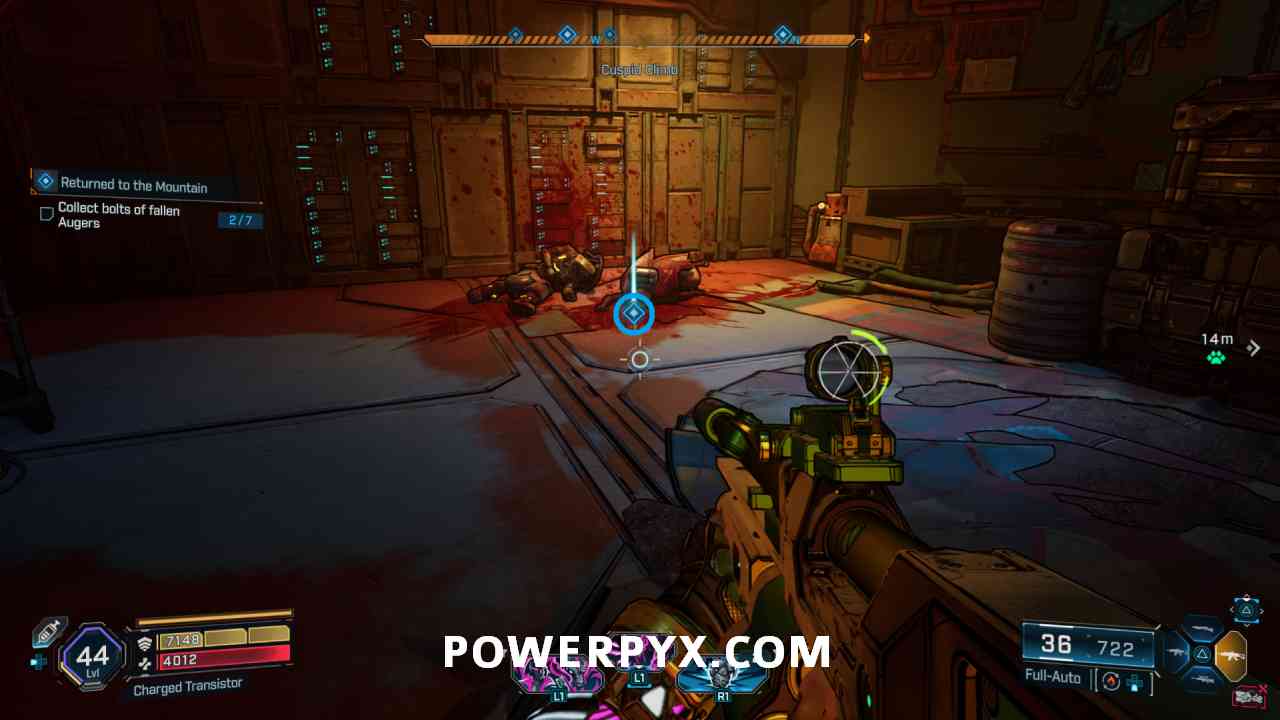
Bolt #7 Location

Go around the room in the other direction and defeat the enemies, then pick up the final bolt from the metal beam between the two cliffs.
Important:
This area often spawns a badass enemy. Be prepared for a tough fight before collecting the final bolt.
Return to Calder
Leave the cave and return to Calder in Belton's Bore. The path back is the same way you came, but some enemies may have respawned.
The route back to Belton's Bore from Clavehome
Place Bolts on Memorial (x7)
Walk over to the board left of the stairs where Calder will be walking. Interact with the seven points to place the bolts to complete the mission.

The memorial board where you place the collected bolts
Reward Details:
- 15,000 XP
- $12,450
- 45 Eridium
- Rare shotgun "Mountain's Call" (random element)
Mission Completion
This finishes Returned to the Mountain side mission in Borderlands 4. After placing all bolts, you'll receive your reward and Calder will have additional dialogue about honoring his fallen comrades.
Full mission completion video
Additional Tips for Returned to the Mountain Mission
Combat Strategies
- Use cover effectively in the cave sections
- Focus on drone enemies first as they can be annoying
- Consider using area-of-effect weapons for grouped enemies
- Watch for environmental hazards like explosive barrels
Loot Opportunities
- Check all containers in the cave for additional loot
- Defeat all enemies for maximum XP gain
- There's a hidden chest behind a breakable wall near bolt #5
- Some enemies have increased chance to drop grenade mods
After Completing Returned to the Mountain
Once you've completed this mission, several new opportunities become available:
Unlocked Content
New Vendor
Calder becomes a weapon vendor with unique Auger-themed items
Follow-up Quest
"Auger's Revenge" becomes available after 24 in-game hours
Fast Travel
Clavehome becomes available as a fast travel location
Comments
There are no comments yet. Have you completed this mission? Share your tips and experiences below!