
Borderlands 4: Null and Void Walkthrough
Complete guide to finishing the Null and Void faction mission in Borderlands 4 with detailed objectives, tips, and rewards.
Table of Contents
How to Unlock Null and Void in Borderlands 4
To start the Null and Void faction mission, you must first complete the main story mission "Rush the Gate." This mission becomes available after reaching level 15 and progressing through the main storyline on the planet Promethea.

Completion screen for Rush the Gate mission
After completing the main mission, travel to The Howl region, slightly south of Outbounders HQ. Look for Rush standing at the side of a road near a broken-down vehicle. He'll have a exclamation mark above his head indicating he has a mission for you.
Rush's location at The Howl
Borderlands 4 Null and Void Mission Walkthrough
Find Conway Objectives
1. Talk to Rush at Outbounders HQ
After accepting the mission from Rush, he'll ask you to meet him at the Outbounders HQ to discuss the details of finding Conway, a missing member of their group.
2. Find Conway's First ECHO Log
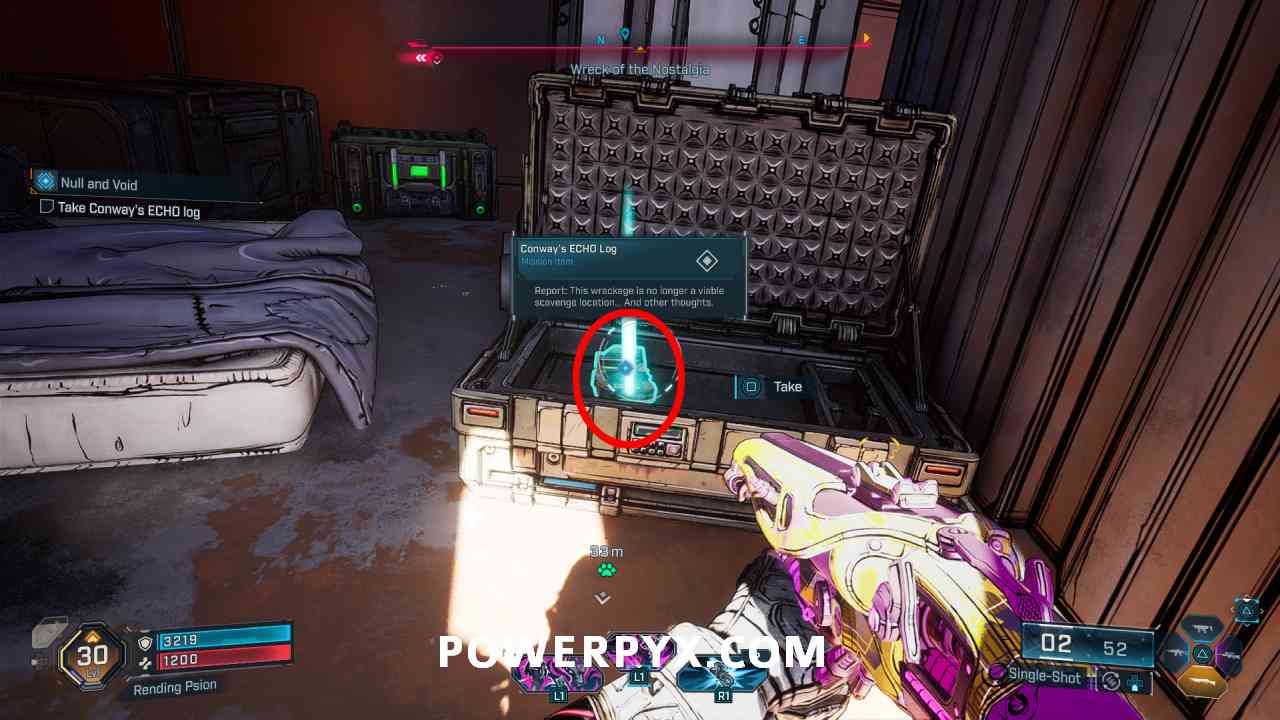
Head east to the Wreck of the Nostalgia location. Clear the area of Skags and Marauders before searching for clues. You'll find Conway's first ECHO Log beside a makeshift bed near the ship's wreckage.
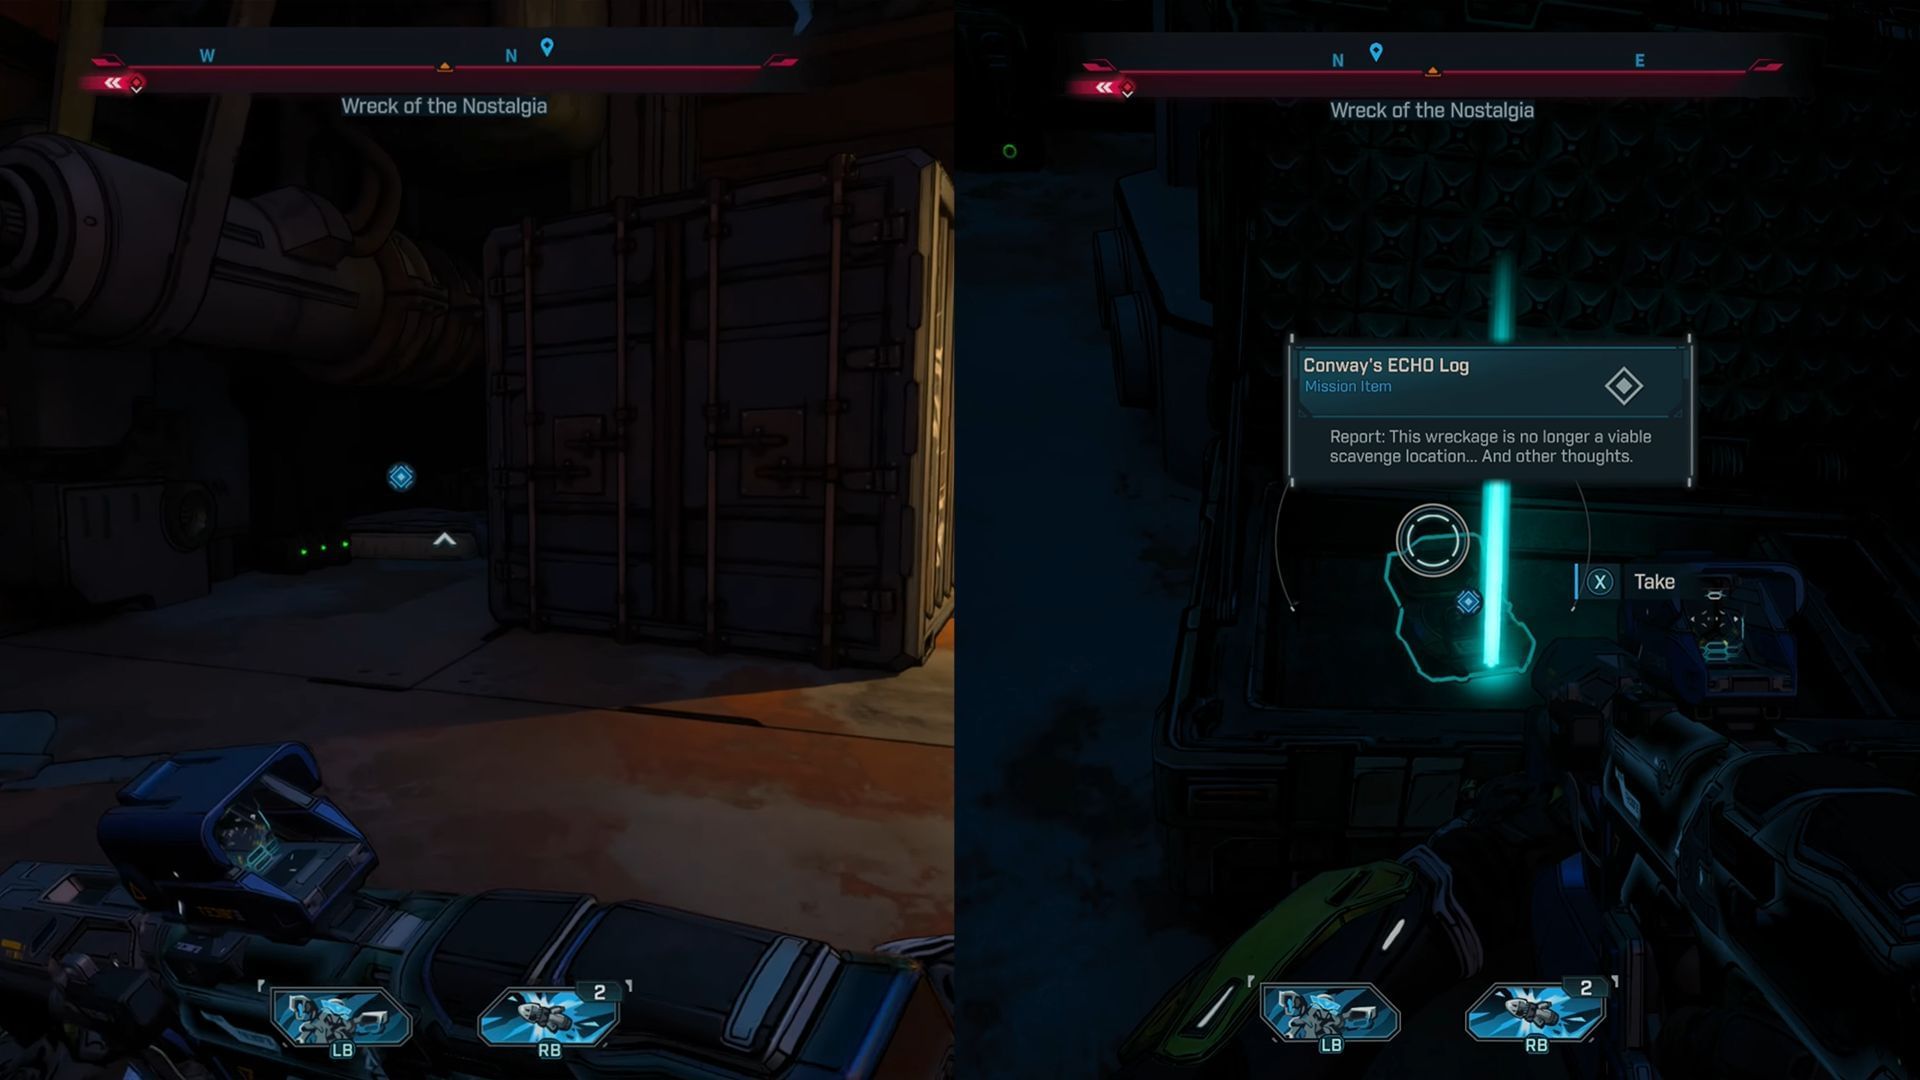
ECHO Log location at Wreck of the Nostalgia
3. Locate Conway's Second ECHO Log
Travel northeast to Hungering Plain. Cross the broken bridge and search the area for a second ECHO Log beside a weathered chair near a campfire.
Second ECHO Log location at Hungering Plain
4. Use the Intercom at Tetanus Quad
Head to the crash site in Tetanus Quad, just past Idolator's Noose. Look for a reinforced door with an intercom system. Use it to speak with Chugs, the ripper who has information about Conway.
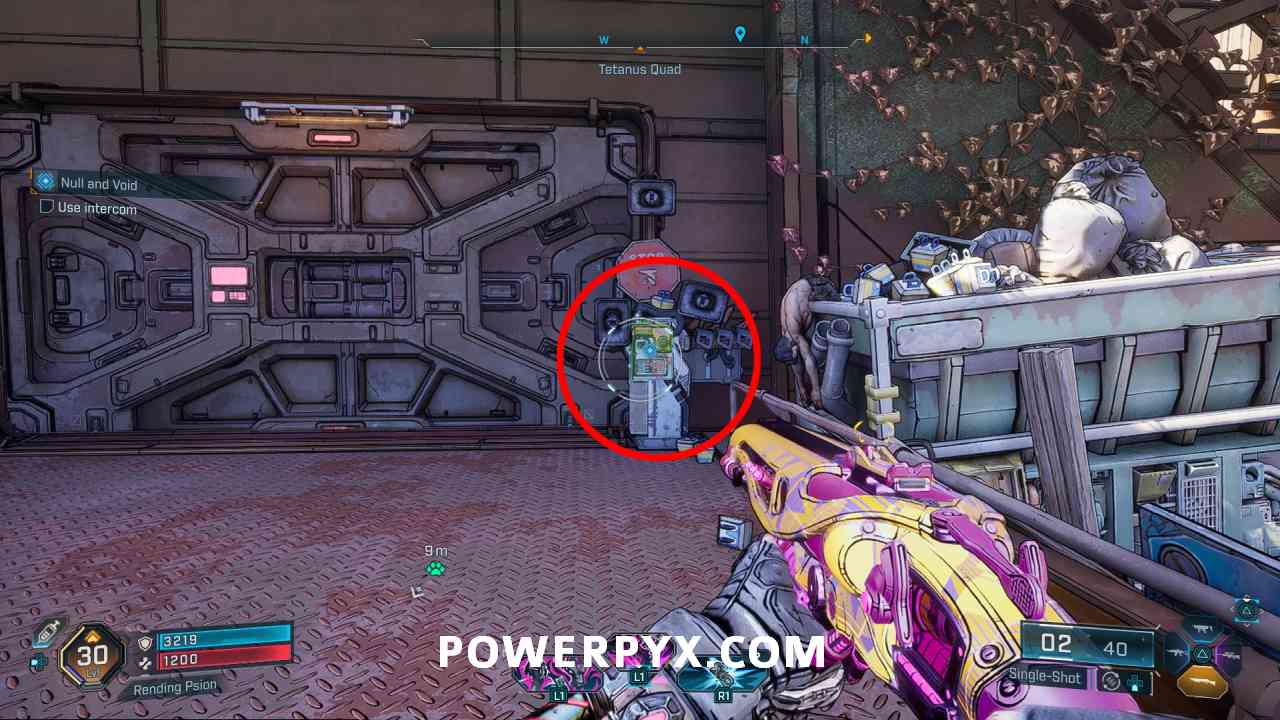
Intercom location at Tetanus Quad crash site
5. Retrieve Rippers' Food Supplies
Chugs will demand food in exchange for information. Travel south to Rattlehead Crest shoreline and collect 10 boxes of scattered food supplies. Watch for hostile wildlife in the area.

Food box locations at Rattlehead Crest
6. Place Food at Designated Spot
Return to the intercom and you'll be granted entry to the ripper compound. Place the food on the marked spot in the center of the area. Be prepared for an ambush!

Designated food placement area
7. Defend Against Ripper Attack
After placing the food, the rippers will turn on you. Eliminate all hostile rippers to secure the area. Use cover and area-of-effect weapons for these close-quarters engagements.
8. Find Crane Controls
Conway will direct you to the crane controls to lower their cage. The crane controller will attack on sight - defeat him first. Then climb the crane structure and interact with the controls.
Glitch Warning: Missing Switch on Crane Controls
Some players report a glitch where the switch doesn't appear on the crane controls. If this happens, save and quit the game, then reload to resolve the issue.

Crane controls location
Free Conway Objectives
1. Energize Starboard and Port Valves
To free Conway, you need to power up the ship's engines. Find and activate both the starboard and port engine valves.
The starboard engine is located in the void-exposed area. Watch your step! The port engine is accessed by hopping down from the starboard platform to the left side and finding an entrance.

Starboard and port engine valve locations
2. Activate Warp Jump Switch
After energizing both engines, turn around and follow the path to find the warp jump switch. Activate it to continue the process of freeing Conway.

Warp jump switch location
3. Free Conway From Cage
Return to Conway's cage and shoot the winch mechanism above it to lower the cage and free Conway. Use precise weapons to avoid hitting Conway accidentally.

Shoot the winch to free Conway
4. Defeat Chugs
After freeing Conway, Chugs will appear with reinforcements. Focus fire on Chugs first as he's the most dangerous opponent. Use elemental weapons effective against armor.

Chugs boss battle
5. Meet with Outbounders
After defeating Chugs, meet with the Outbounders who arrive at the location to extract Conway. Speak with Rush to complete the mission and receive your rewards.
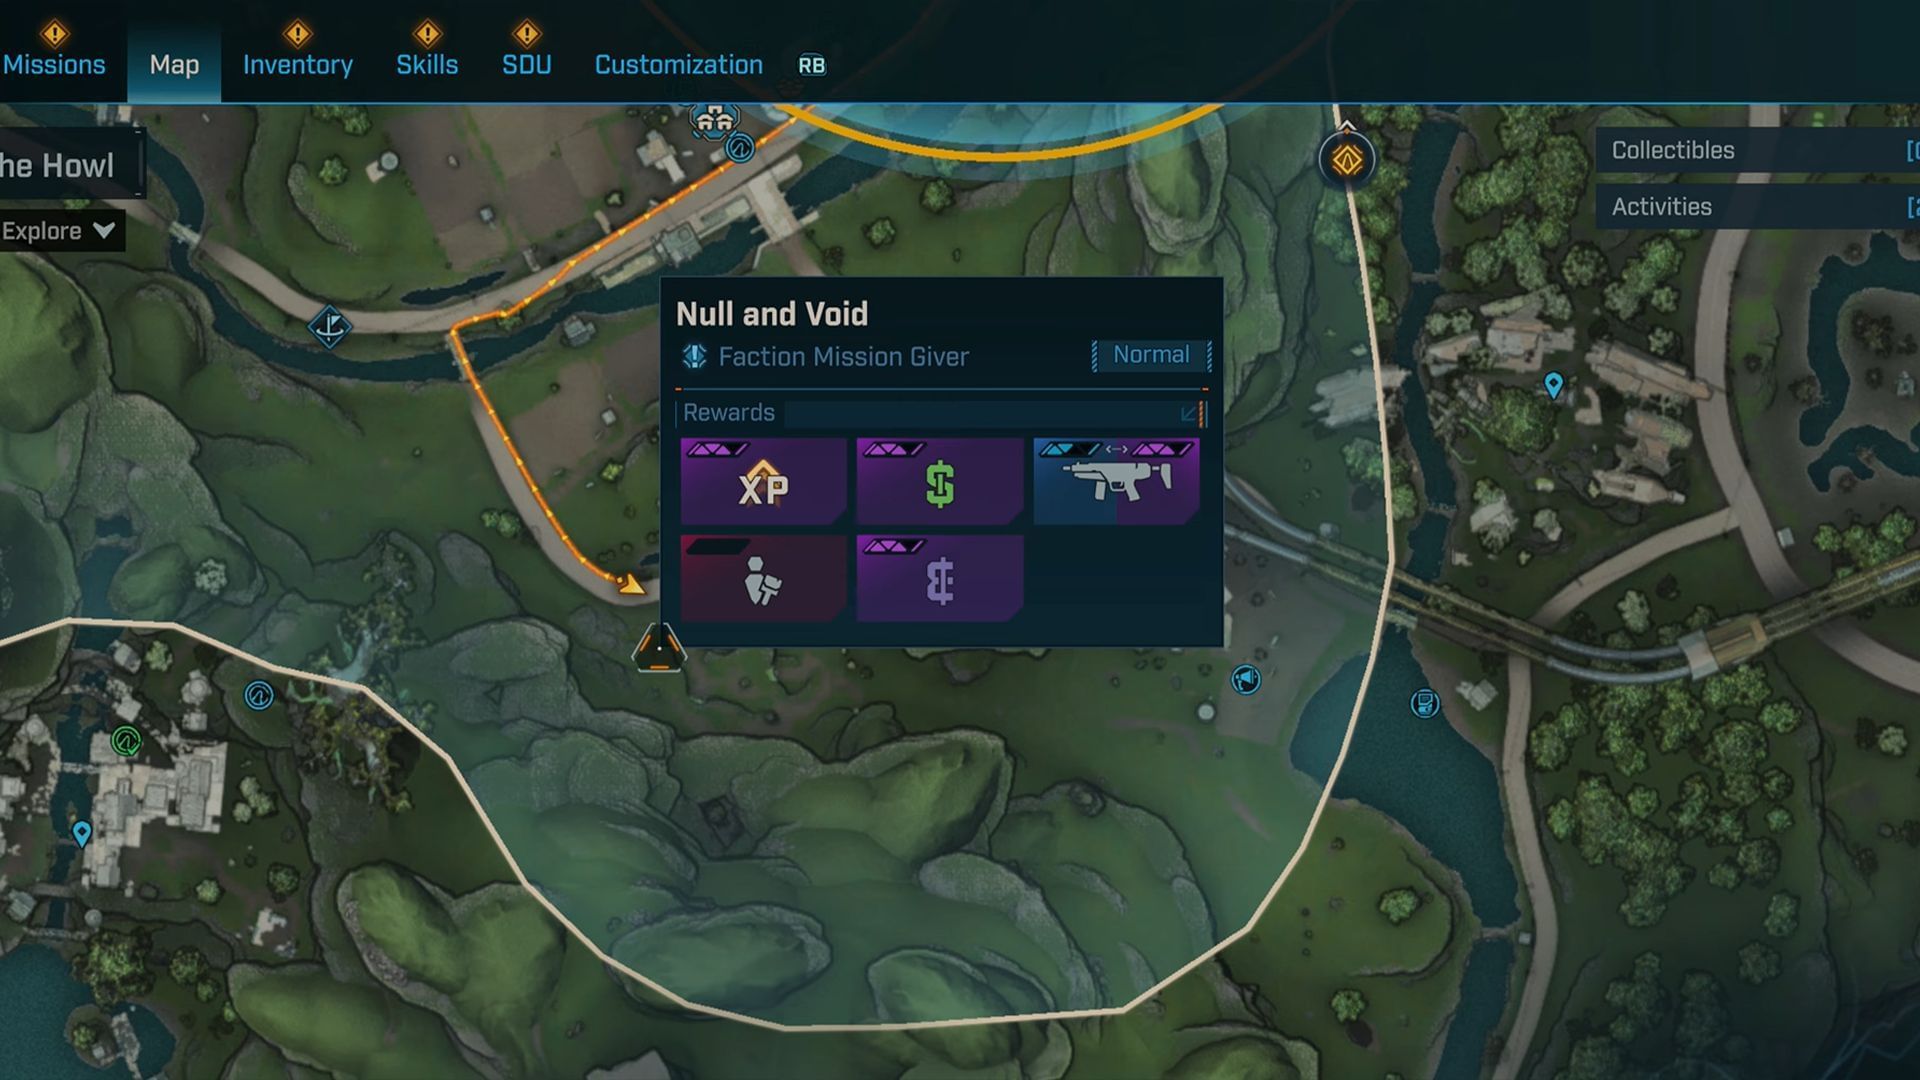
Borderlands 4 Null and Void Mission Rewards
Base Rewards
- Substantial Cash reward (scales with level)
- Large XP bonus (scales with level)
- 25-35 Eridium
- Increased reputation with Outbounders faction
Equipment Rewards
- Void-Touched SMG (Blue to Purple rarity)
- Random epic class mod chance
- Grenade mod with void damage effect
Cosmetic Rewards
- Vault Hunter Style: "Out of Bounds"
- Weapon skin: "Nullifier"
- ECHO device skin: "Void Walker"
- Emote: "Portal Dance"

Rewards from completing Null and Void mission
Related Borderlands 4 Guides
Outbounders Faction Missions
Complete all Outbounders faction missions to unlock exclusive rewards and learn more about the story.
- Edge of Reality Walkthrough
- Quantum Quandary Guide
- Beyond the Veil Mission
Borderlands 4 Beginner Guides
New to Borderlands 4? Check out these essential guides to get started.
- Character Class Guide: Which Vault Hunter to Choose
- Elemental Damage Types Explained
- How to Farm Legendary Weapons
Promethea Planet Guide
Explore all that Promethea has to offer with our complete planetary guide.
- All Region Chest Locations
- Hidden Easter Eggs and References
- Typhon Logs and Crew Challenges
Borderlands 4 Endgame Content
What to do after completing the main story in Borderlands 4.
- True Vault Hunter Mode Guide
- Mayhem Mode Explained
- Raid Boss Strategies
More Borderlands 4 Content Coming Soon!
Stay tuned for more Borderlands 4 guides, walkthroughs, and tips. Bookmark this page and check back regularly for updates as we explore the Borderlands together!