
Borderlands 4 Down and Outbound Mission Start
Objective 1: Go to Outbounders HQ
Begin by opening your map to see your next objective marker. Use the ECHO Location feature to visualize your path to Outbounders HQ, which will help navigate the complex terrain.
As you travel, you'll encounter various enemy patrols. It's recommended to eliminate them for experience points and potential loot drops.
Plungeford Settlement

On your route to Outbounders HQ, you'll pass through Plungeford, a small settlement occupied by hostile forces. Clear enemies as you navigate through the settlement's winding paths.
As you climb to the higher cliffs of Plungeford, be prepared for a miniboss encounter.
The Exterminator Miniboss

The Exterminator appears as you reach the higher ground in Plungeford. This miniboss is optional at this stage and can be challenging for underleveled characters.
Pro Tip: You can run past The Exterminator if you're not prepared for the fight. He won't pursue you beyond Plungeford, and you can return later to defeat him for additional rewards.
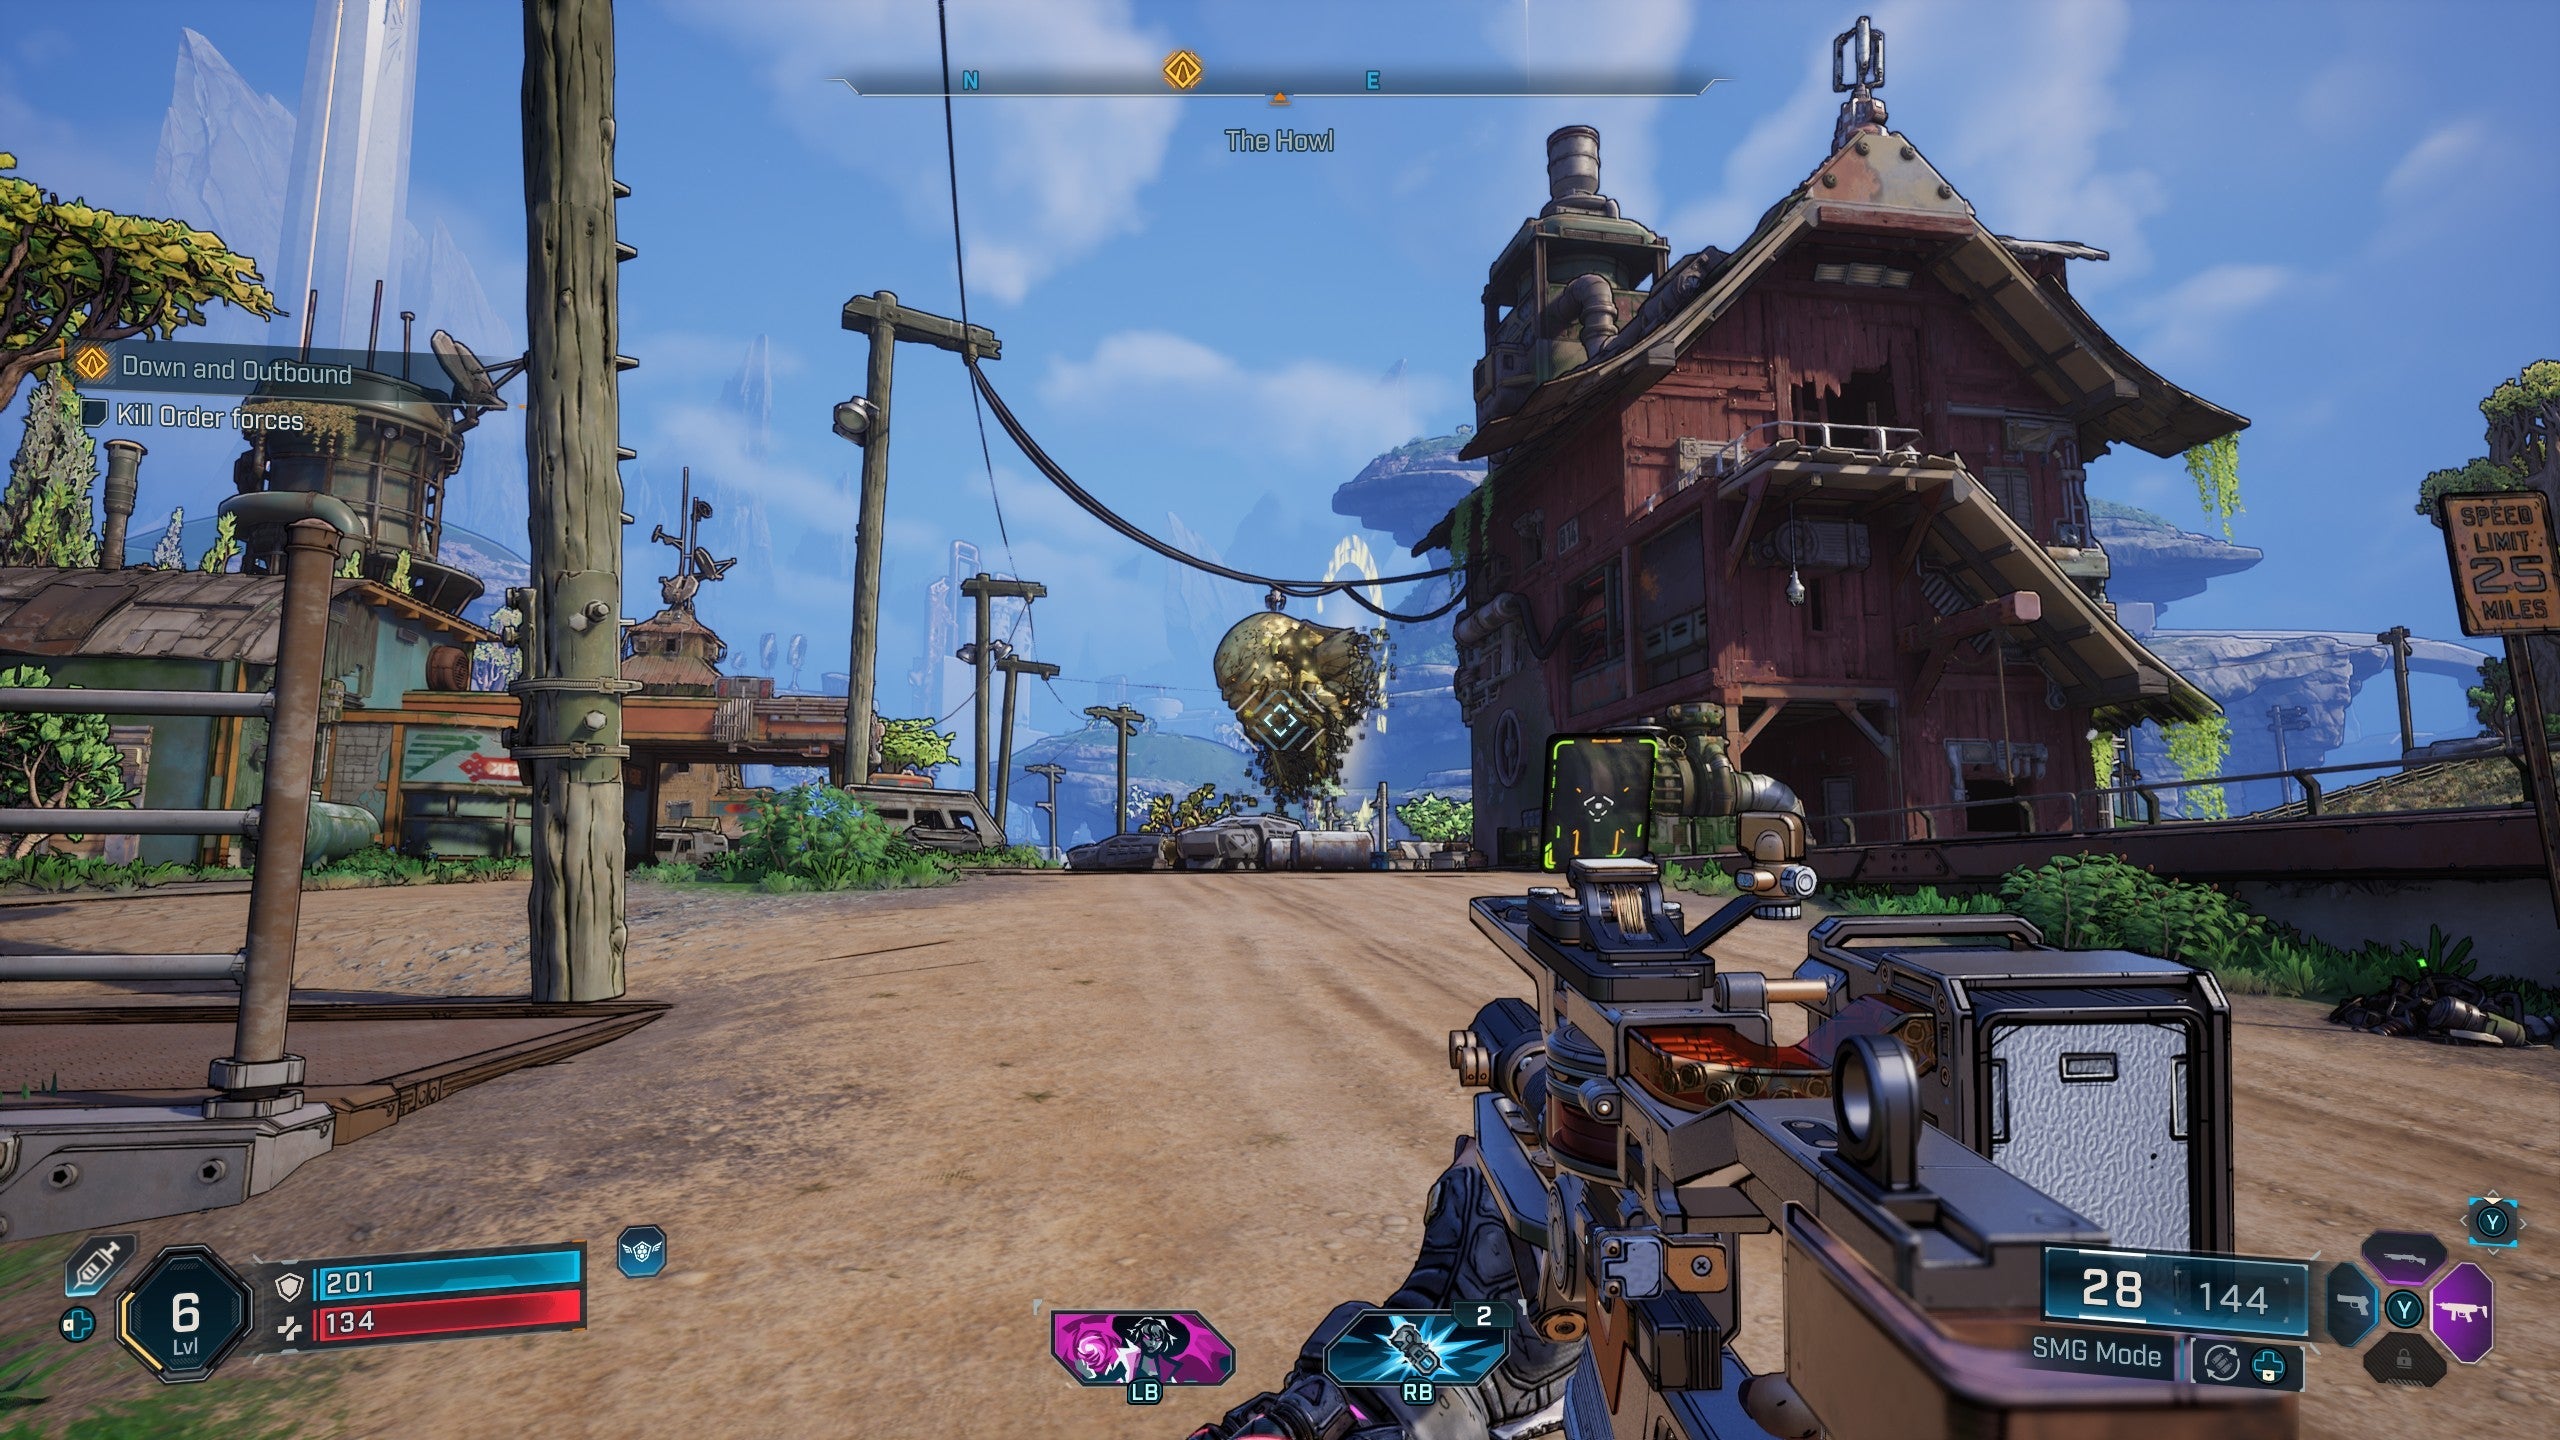
The Howl Area

After exiting Plungeford, you'll reach The Howl, where Idolator Sol appears with Order forces that intercept you on the main road. Fortunately, Outbounders in the area will assist you in repelling these enemies.
Focus on eliminating the Order troops while using cover effectively. The Outbounders provide helpful distraction, allowing you to pick off enemies from a distance.
Borderlands 4 Digirunner Vehicle Unlock
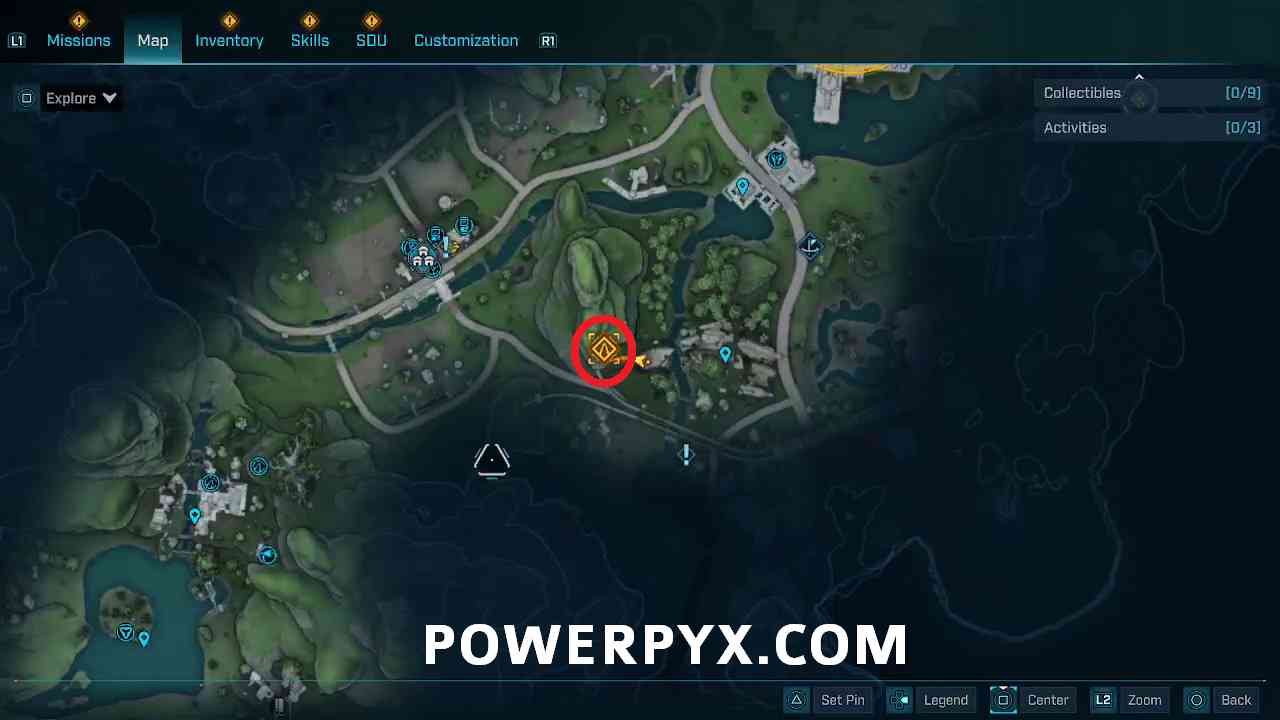
Objective 2: Go to the Order Surveillance Center
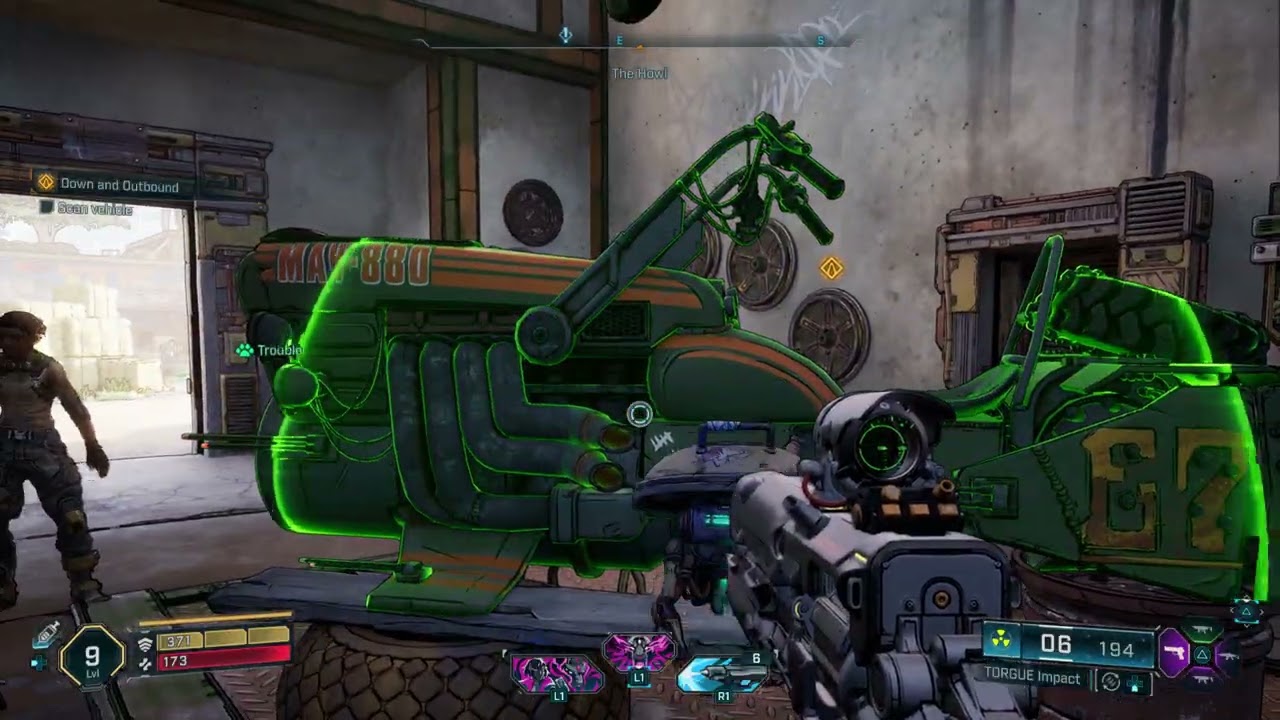
After eliminating the Order's forces at The Howl and meeting Rush at Outbounders HQ, you'll be directed to meet Conway who supplies you with a digirunner vehicle for faster traversal.
The digirunner is essential for covering the large distances in Borderlands 4's open world and comes equipped with basic weaponry for dealing with enemy encounters while driving.
Travel to Order Surveillance Center
On your digirunner, follow the main road to the Order surveillance center. Along the way, you'll encounter more Order forces attempting to intercept you.
Use the digirunner's weapons to eliminate enemies from a distance, and take cover behind terrain when needed. The vehicle provides good mobility to avoid concentrated enemy fire.
Navigation Tip: If you become unsure of the route, use ECHO Location again to visualize the path to the surveillance center.
Borderlands 4 Spymaster Boss Fight Strategy
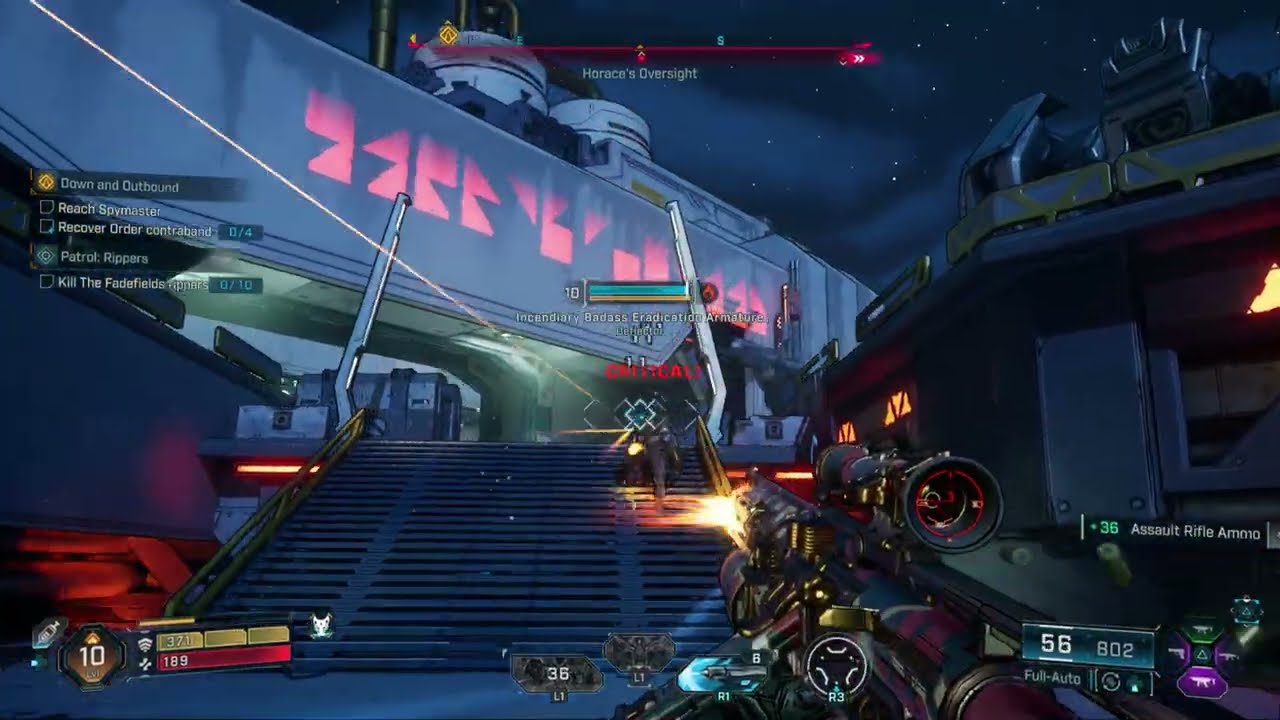
Objective 3: Find and Defeat Spymaster
At the Order surveillance center, you'll encounter new enemy types guarding the entrance. These enemies are more resilient than previous foes and may have specialized attacks.
Use the building structures and barricades for cover to deflect projectiles. Flank enemies when possible to catch them off guard.
Inside the Surveillance Center
Advance further inside the building to eliminate more enemies. After clearing several rooms, Rush will contact you about retrieving 4 pieces of Order contraband scattered throughout the facility.
These contraband items are marked by blue pins on your ECHO map. While collecting them is optional for mission completion, they provide valuable rewards and backstory elements.
Approaching Spymaster

Follow the objective marker until you find stairs leading to a dark room where Spymaster awaits. Clear the enemies guarding the path before proceeding to the boss fight.
Preparation Tip: Before engaging Spymaster, ensure you have plenty of ammunition and health restoratives. Consider equipping shock weapons to quickly deplete his shields.
Spymaster Boss Fight Tactics
Phase 1: Shielded Attacks
Spymaster begins the fight with an active shield that makes him resistant to damage. During this phase, he primarily uses ranged attacks:
- Dodge his energy projectiles by moving laterally
- Take cover behind pillars when he unleashes volleys
- Use shock weapons to deplete his shields faster
Phase 2: Melee Combat
After destroying his shield, Spymaster becomes more aggressive and incorporates melee attacks:
- Watch for his teleportation tells before melee strikes
- Maintain distance and use corrosive weapons against his health
- Focus fire on his critical spots when he pauses between attacks
Loot Advice:
After defeating Spymaster, thoroughly loot his arena for potential rare weapons, shields, and class mods. He has an increased chance to drop specialized spy-themed gear.
Borderlands 4 Bolt Scanners Locations Guide
Objective 4: Find the Three Bolt Scanners

After beating Spymaster, use ECHO Location to navigate to the Wreck of Nostalgia area where the three bolt scanner parts are located. These can be collected in any order.
Each scanner part is guarded by enemies, so be prepared for combat encounters. The area features verticality, so watch your footing while exploring.
First Bolt Scanner Location

The first bolt scanner is near the entrance to the Wreck of Nostalgia, marked by a distinctive blue trail. Follow this trail to locate the scanner.
Eliminate the patrols in this area before attempting to retrieve the scanner to avoid being overwhelmed during the interaction sequence.
Second Bolt Scanner Location

From the first scanner location, proceed forward until you see a large metal pipe jutting out from the wreckage. Run and jump off the ledge to reach the area on the other side.
After eliminating enemies in this section, climb the stairs to find the second bolt scanner. Watch for enemy ambushes as you ascend.
Third Bolt Scanner Location

From the second scanner location, look for a grassy cliff you can drop down to. Below, a cave containing the third bolt scanner is guarded by a powerful enemy.
Defeat this enemy before claiming the final scanner. Once all three are collected, return to Outbounders HQ to install them and scan Spymaster's bolt to complete the mission.