
Borderlands 4 Brew-ha-ha Walkthrough
Your complete guide to completing the hilarious Brew-ha-ha side mission in Borderlands 4 and helping Ole Shammy get his precious nuggies!
Brew-ha-ha is one of the most entertaining side missions in Borderlands 4 (BL4), featuring the eccentric character Ole Shammy and his quest for the perfect "nuggies." This comprehensive walkthrough will guide you through all objectives of the Brew-ha-ha Side Quest with detailed strategies and tips.
Mission Details
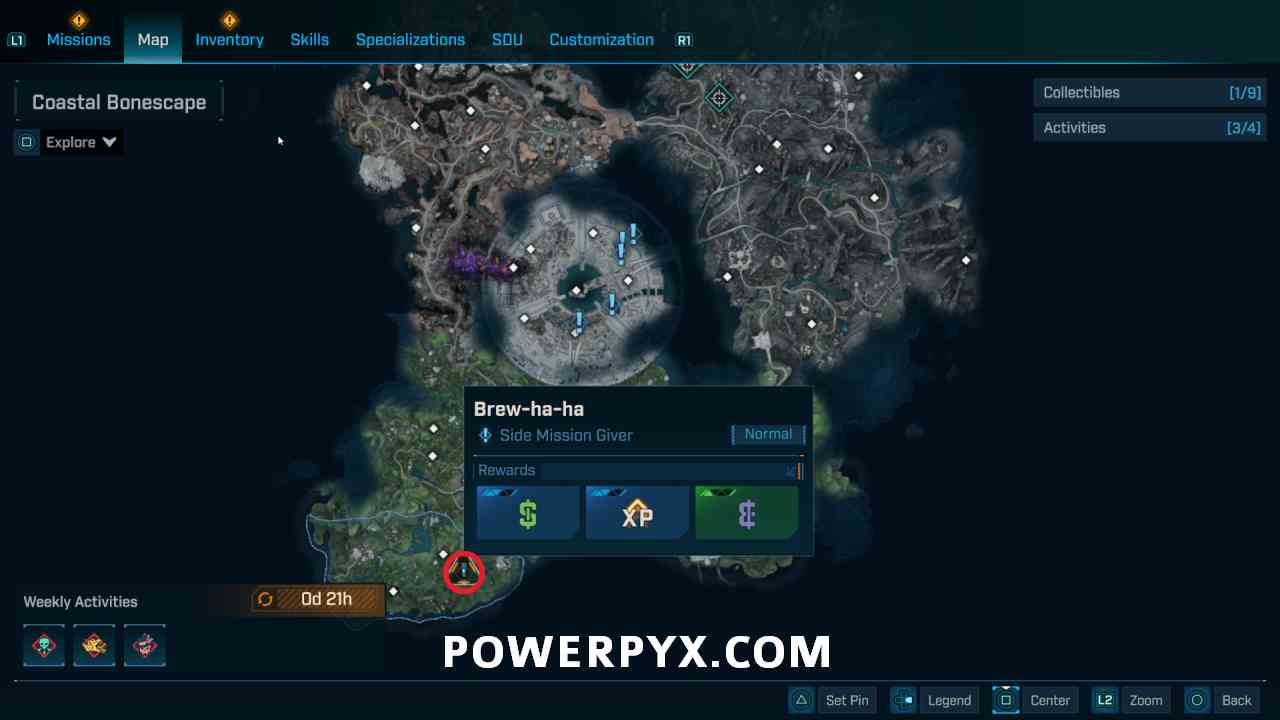
- Starting Location: The Fadelands > Coastal Bonescape
- Quest Giver: Ole Shammy
- Unlock Requirement: Available after completing Side Missions Mob Mentality > Mob Rules > Angry Mob > Mob Justice > La-La-Last Call + Hangover Helper > Ain't No Sham in It
- Reward: XP, Money, Eridium
- Quest Description: Help Ole Shammy get his nuggies!
Borderlands 4 Brew-ha-ha Starting Location
To begin the Brew-ha-ha mission in Borderlands 4, you'll need to first complete the prerequisite quest chain. Once you've finished "Ain't No Sham in It," head to The Fadefields > Coastal Bonescape > Shammy's Shack where you'll find Ole Shammy waiting for your assistance.

Ole Shammy at his shack in Coastal Bonescape
Ole Shammy is a colorful character with a distinct Southern charm who runs a makeshift moonshine operation. He'll explain that he needs specific "nuggies" to create his legendary primo shine, but he's unable to collect them himself due to "complications" (likely involving local wildlife and his own laziness).
How to Reach the Geyser in Brew-ha-ha Borderlands 4
Your first objective is to reach the geyser where the precious nuggies are located. From Shammy's Shack, head southeast toward the marked location on your map.
The path leading to the geyser in Coastal Bonescape
The journey to the geyser isn't particularly dangerous, but keep an eye out for occasional skag packs and other hostile creatures that might be roaming the area. The terrain is rocky with some vertical elements, so be prepared for some light platforming.
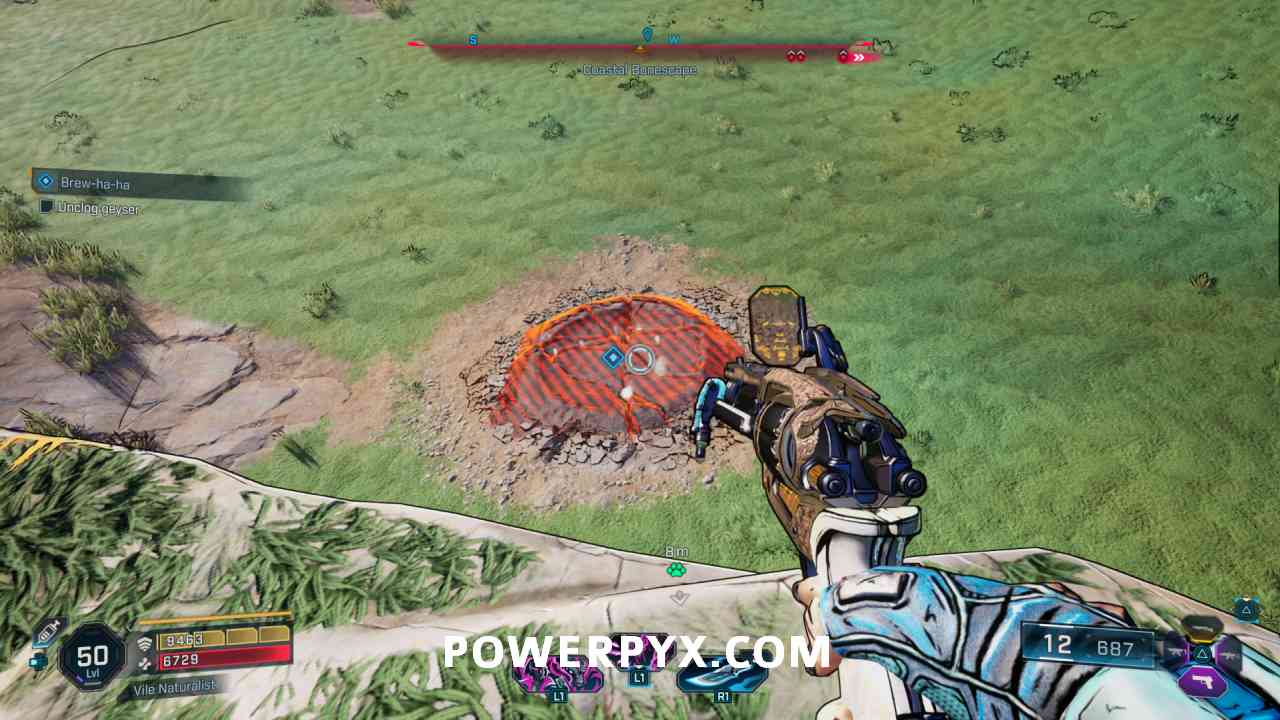
Unclogging the Geyser in Borderlands 4 Brew-ha-ha Quest
When you arrive at the geyser, you'll find it blocked and unable to produce the nuggies Ole Shammy needs. To unclog it, you'll need to perform a ground slam attack directly onto the obstruction.

Position yourself on the ledge above the geyser for the ground slam
Climb up on the nearby ledge to get enough height for an effective ground slam. Jump off and press the crouch button while in the air to perform a slam attack directly onto the clogged geyser. This will clear the obstruction and cause colored nuggets to start flying out.
Borderlands 4 Colored Nuggets Puzzle Solution
The next phase of the Brew-ha-ha mission is the most challenging part. You need to grapple nuggets flying out of the geyser and throw them into the receptacle in the correct order.
Nuggets flying out of the geyser that need to be caught
The correct order of colors is random for each playthrough, but Ole Shammy will provide hints through your ECHO device. Pay attention to his ramblings for clues about which color comes next.
Pro Tips for the Nugget Challenge
- Use the environment for better positioning - stand on higher ground to have a better angle for grappling
- If you grab the wrong nugget, you can throw it away by pressing the reload button
- After placing the first correct nugget, a 6-minute timer will start - work efficiently!
- Manglers will spawn from nearby caves during this phase - focus on the nuggets and only fight them if necessary
- The correct order typically consists of 5-7 nuggets, depending on your game difficulty
Complete guide to solving the colored nuggets puzzle
Where to Find Primo Shine in Borderlands 4 Brew-ha-ha Mission
After successfully throwing all the required colored nuggets into the receptacle, the primo shine will be dispensed into a container below the receptacle.
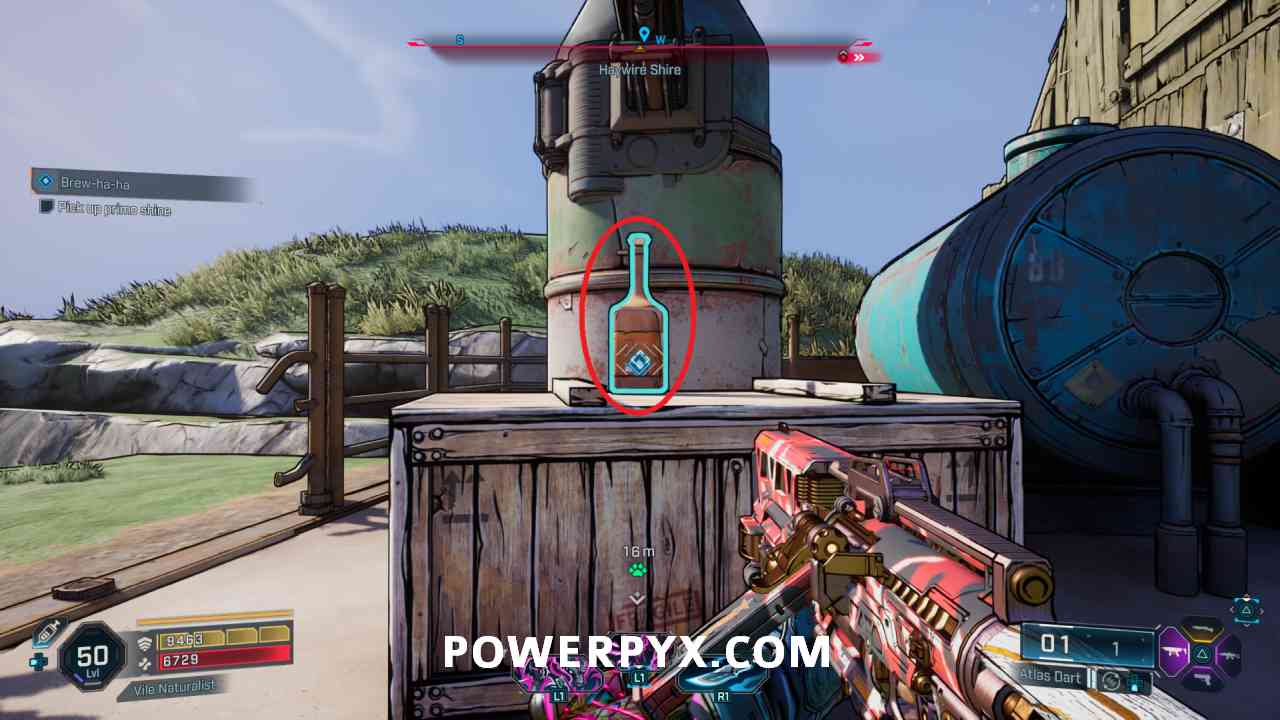
The primo shine container after completing the nugget challenge
Approach the container and press the interaction button to collect the primo shine. Be aware that sometimes a few remaining Manglers might attack during this moment, so be prepared to defend yourself before making the collection.
Returning to Ole Shammy to Complete Brew-ha-ha Mission
With the primo shine in your inventory, make your way back to Shammy's Shack in Coastal Bonescape. The path back is the same route you took to reach the geyser, though you might encounter some respawned enemies along the way.
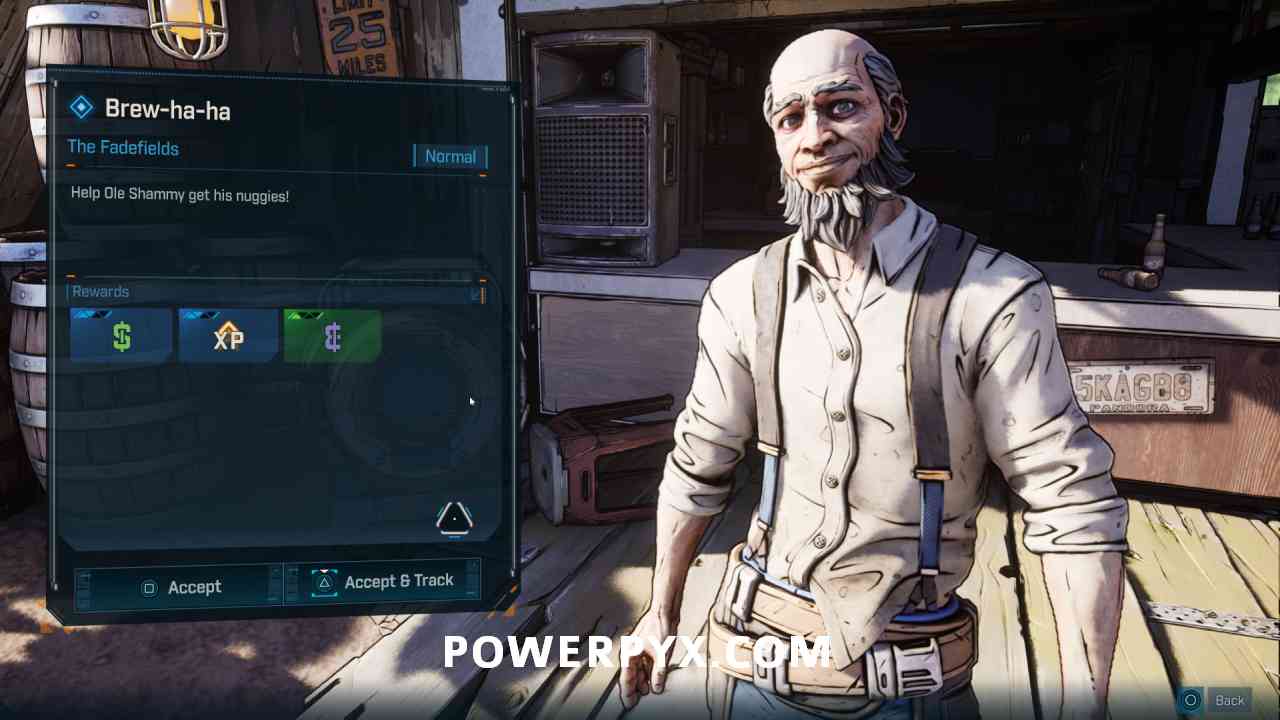
Ole Shammy waiting for his primo shine at Shammy's Shack
Interact with Ole Shammy to hand over the primo shine. He'll reward you with XP, money, and Eridium based on your level and the game's difficulty setting. Additionally, he might offer some unique dialogue that hints at future missions or provides backstory about the area.
Mission Rewards
- XP: Scales with player level (approximately 5-7% of a level)
- Money: Moderate amount based on level
- Eridium: 15-25 based on difficulty
- Additional: Chance to receive a unique weapon or shield related to the mission theme
Borderlands 4 Brew-ha-ha Mission Conclusion
Completing the Brew-ha-ha side mission not only provides valuable rewards but also offers some of the most humorous dialogue in Borderlands 4. Ole Shammy's eccentric personality and the absurdity of the nuggies collection process make this mission a memorable experience.
This mission is part of a longer quest chain that explores the moonshine culture of Pandora and gives insight into one of the more colorful aspects of the Borderlands universe. Completing it may unlock additional content or missions related to Ole Shammy and his operations.
Additional Tips & Secrets
- After completing the mission, check back with Ole Shammy occasionally for potential follow-up quests
- The geyser area remains active after the mission, allowing you to practice the nugget grabbing mechanic
- There's a hidden chest near the geyser that becomes accessible after completing the mission
- On Mayhem Mode 4 and above, the nugget order randomizes after each mistake, increasing the difficulty
Share Your Borderlands 4 Brew-ha-ha Experience
Have you completed the Brew-ha-ha mission in Borderlands 4? Share your tips, tricks, or funny moments from this side quest in the comments below!
VaultHunter87
Posted 2 days ago
I struggled with the nugget timing until I realized you can stand on the rocks to the right for a better angle. Also, the Manglers seem to spawn more if you take too long between nuggets!
ClaptrapFan01
Posted 3 days ago
Ole Shammy has to be one of the best new characters in BL4. His dialogue during this mission had me laughing out loud. Did anyone else notice the hidden whiskey bottles around his shack that reference real-world brands?
More Borderlands 4 Guides
Mob Mentality Quest Walkthrough
Complete guide to starting the mob series of quests that lead to Brew-ha-ha.
Read Guide →Borderlands 4 Easter Eggs
Discover hidden references and secrets throughout Pandora and beyond.
Read Guide →