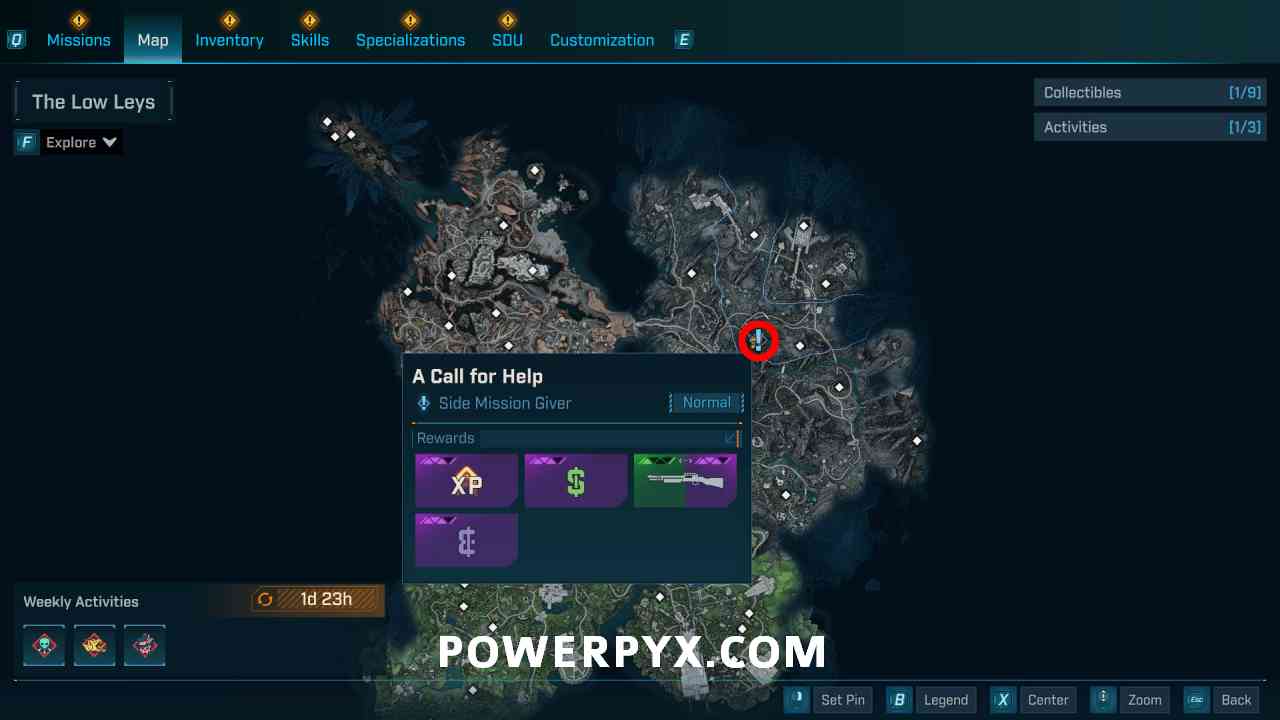
To unlock the A Call for Help side mission in Borderlands 4, you must first complete:
Main Mission: His Vile Sanctum
Side Mission: Meat is Murder
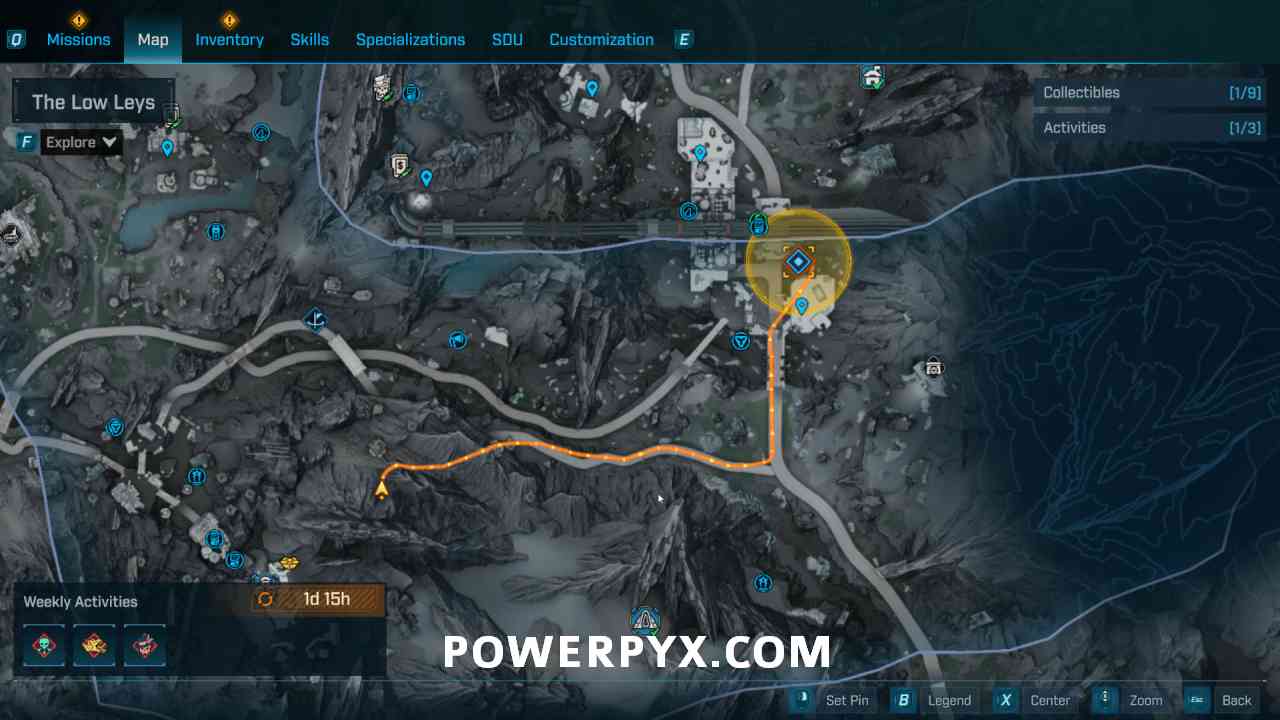
Once both missions are completed, head to Belton's Bore and talk to Arwa who is standing by a mission board.
A Call for Help mission location at Belton's Bore
Borderlands 4: A Call for Help Walkthrough Guide
Find Limos Transponders
1
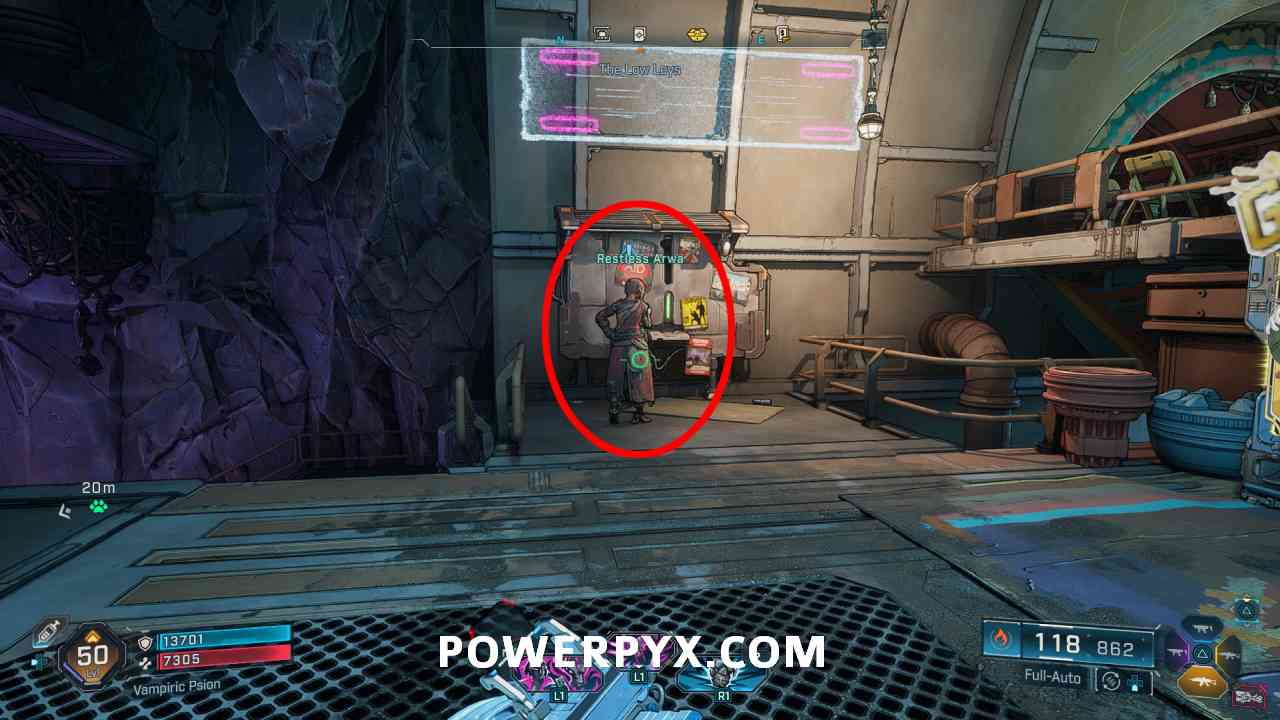
Talk to Arwa at Belton's Bore and follow her to scan her transponder.
2
Go to the marked location to find Quiet Limos' transponder in a large cave.
Optional: Search for signs of Limos:
Bloody footprints under the large skeleton
Mangler corpse at the center of the cave
Cave entrance to the first transponder location
3
At the upper section of the cave, kill the mangler to obtain Limos' transponder.
First transponder location in the cave
4
Search for the second transponder at the next marked location, at Checkpoint Taupe. Kill the Order forces at the entrance.
5
To the right side of the entrance, you will see an open vent on the wall. Enter the vent and follow the path straight (going left takes you to an exit point) to retrieve Limos' transponder.
Second transponder location inside the vent
6
Go to the marked location to find the third transponder at Shadowed Reverie. Kill the Order forces then search the base.
7
Find the locked door. Defend ECHO-4 from enemies while it unlocks the door. Once all enemies are killed and the door is open, take the transponder inside the room.
Defend ECHO-4 while it unlocks the door
8
Look for the last transponder in a cave at Crawler's Folly. Enter the cave and follow the path until you reach a blue force field.
Force field blocking the final transponder
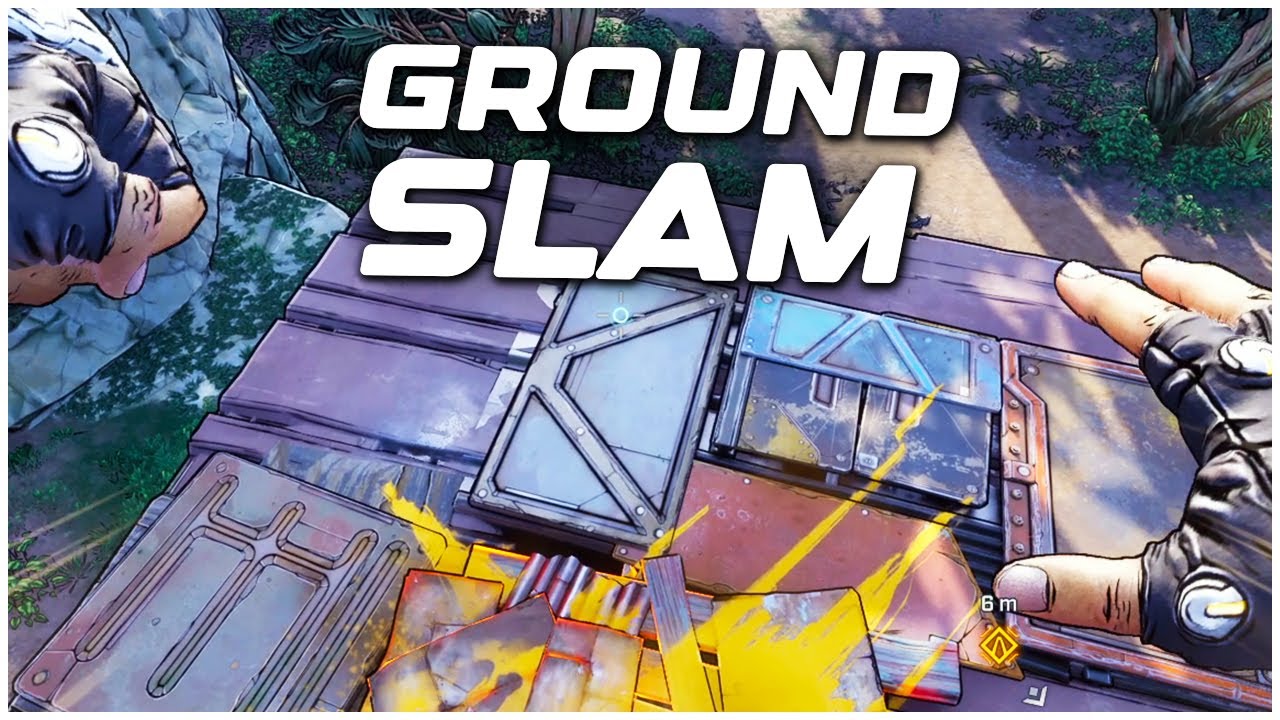
9
To deactivate the force field, destroy the marked pressure plates with ground slams. Then, shoot the heads.
Pressure plates that need to be destroyed with ground slams
10
With the barrier down, enter the room and approach Limos' corpse. Get the transponder on the table beside it, then examine the decapitated head.
Optional: Search the area by interacting with the two items on the table.
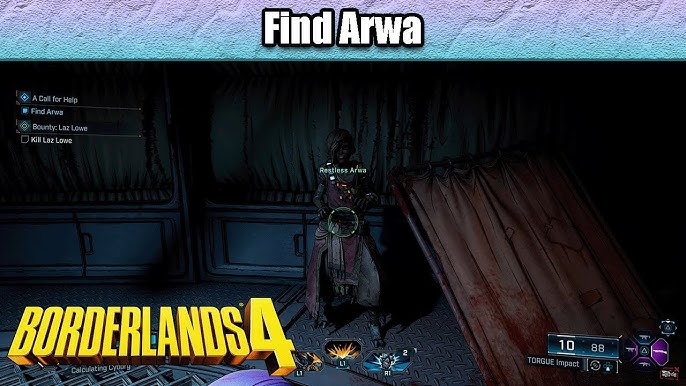
Save Arwa from Danger
1
Find Arwa in another cave in the marked location at Stoneblood Forest. Kill the creeps and deranged Augers inside the cave. Afterwards, you will see that the path to Arwa is blocked by a force field.
Arwa's location in Stoneblood Forest cave
2
Climb the platforms to reach the pressure plates. Like before, ground slam the pressure plates to disable the force field.
Pressure plates needed to disable the force field
3
After disabling the force field, find and talk to Arwa.
Find Limos' Killer in Borderlands 4
1
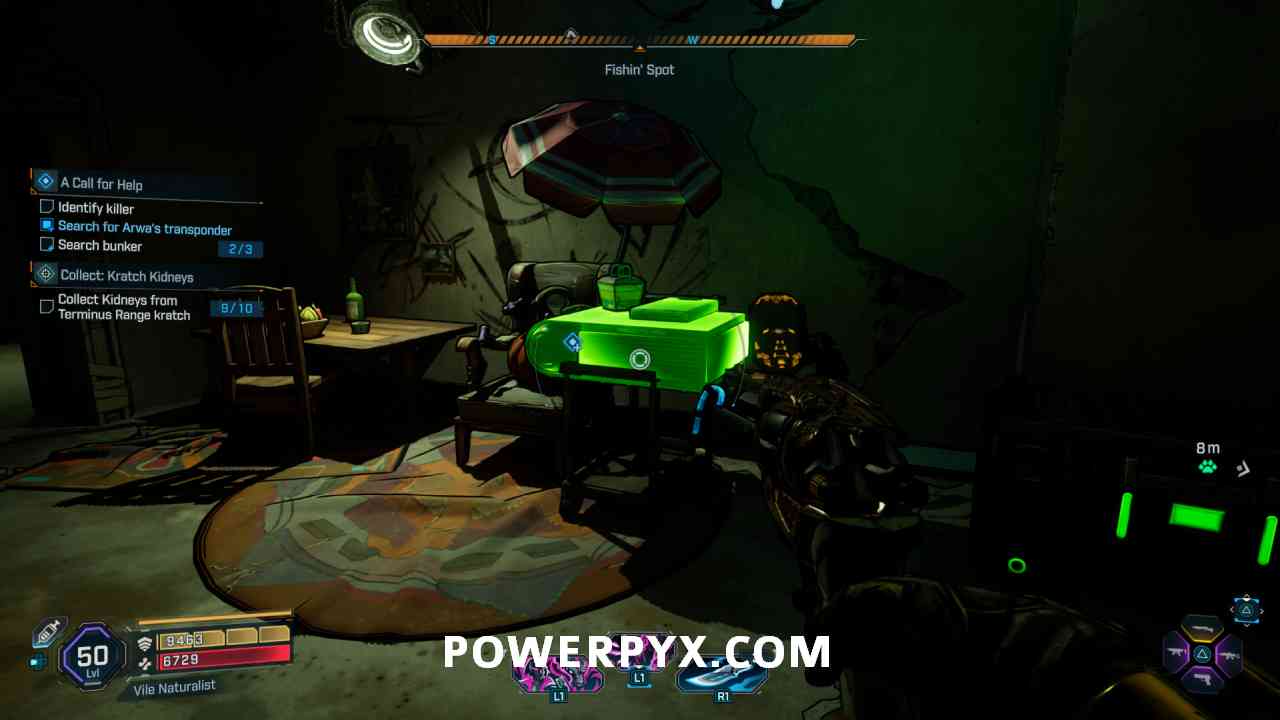
Find Arwa's transponder at Fishin' Spot by Plungeford in The Fadefields. Drop down into a hatch on the grass to land in a bunker.
Fishin' Spot location in The Fadefields
2
Once you drop into the bunker, you will immediately find Arwa's transponder on a table near a radio.
Optional: Search the bunker by interacting with:
The froyo cups by the skulls
The froyo machine
The projector
Arwa's transponder location inside the bunker
3
Proceed to the next room and interact with the board on the wall to identify the killer.
Evidence board to identify Limos' killer
4
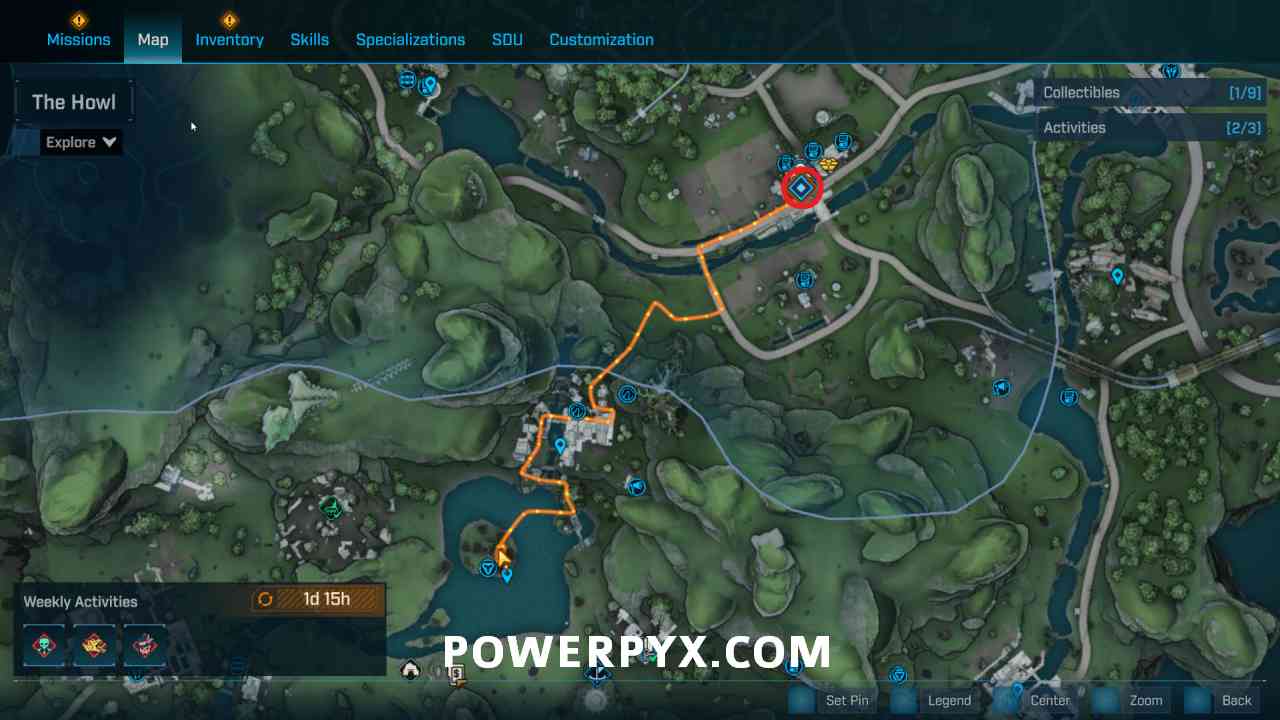
Go to the frogurt stand at The Howl, then run up to the barn ahead to search for the Froyo Guy.
Frogurt stand location at The Howl
5
There, interact with the radio on the table and wait for the barn door to open. Kill the deranged Augers and the Froyo Guy.
Barn location where Froyo Guy is hiding
6
Talk to Arwa to end the mission.
Borderlands 4 A Call for Help Rewards
Side Mission Rewards
Base Reward
Cash
XP
Eridium
Equipment Reward
Shotgun (Green to Purple Rarity)
Example of possible shotgun rewards from this mission
Related Borderlands 4 Guides
Main Mission: His Vile Sanctum
Complete walkthrough for the main story mission required to unlock A Call for Help.
Video guide showing complete walkthrough of A Call for Help side mission
Conclusion
The A Call for Help side mission in Borderlands 4 offers an engaging mystery to solve with satisfying combat encounters and puzzle elements. By following this guide, you should be able to efficiently locate all of Limos' transponders, save Arwa, and identify the killer to complete the mission.
Remember to thoroughly explore each area for optional interactions that provide additional lore and context to the story. The shotgun reward from this mission can be particularly valuable early in the game, especially if you're lucky enough to get a purple rarity version.